DigiCard User Guide
Welcome to DigiCard, the premier digital invitation platform. This guide walks you through every step — from creating your account, to designing beautiful invitation cards, to tracking who actually showed up. You don't need any technical skills.
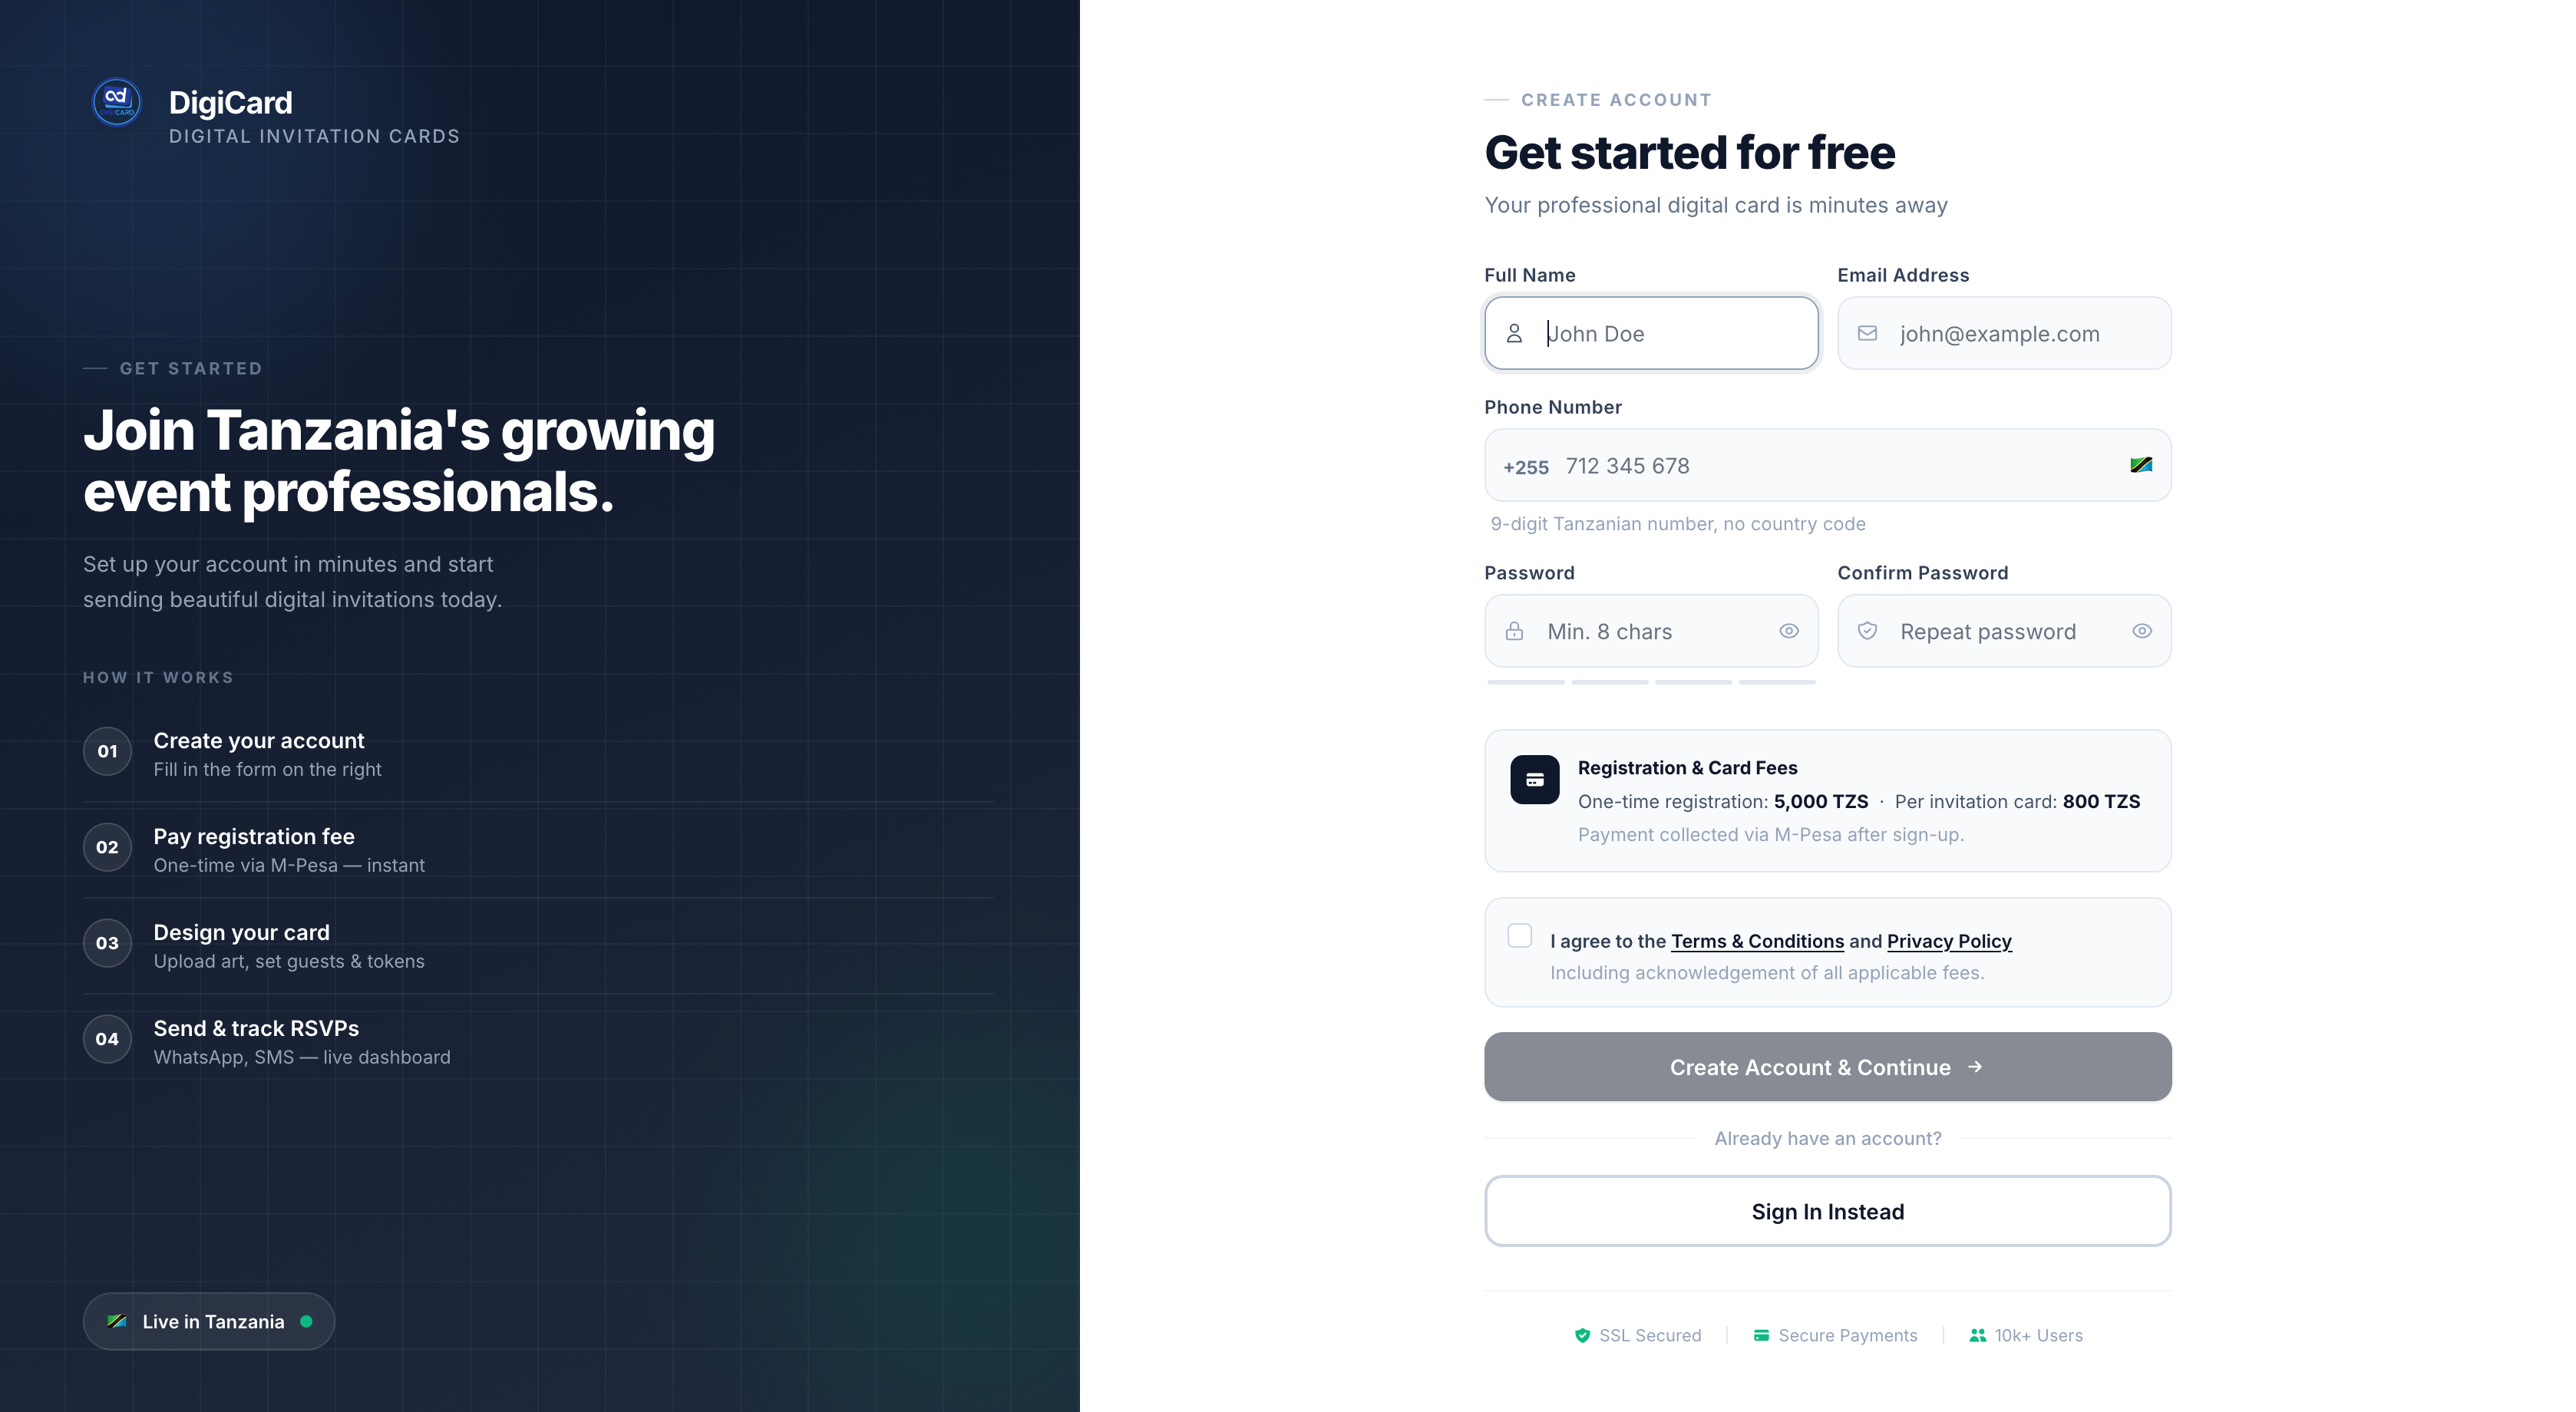
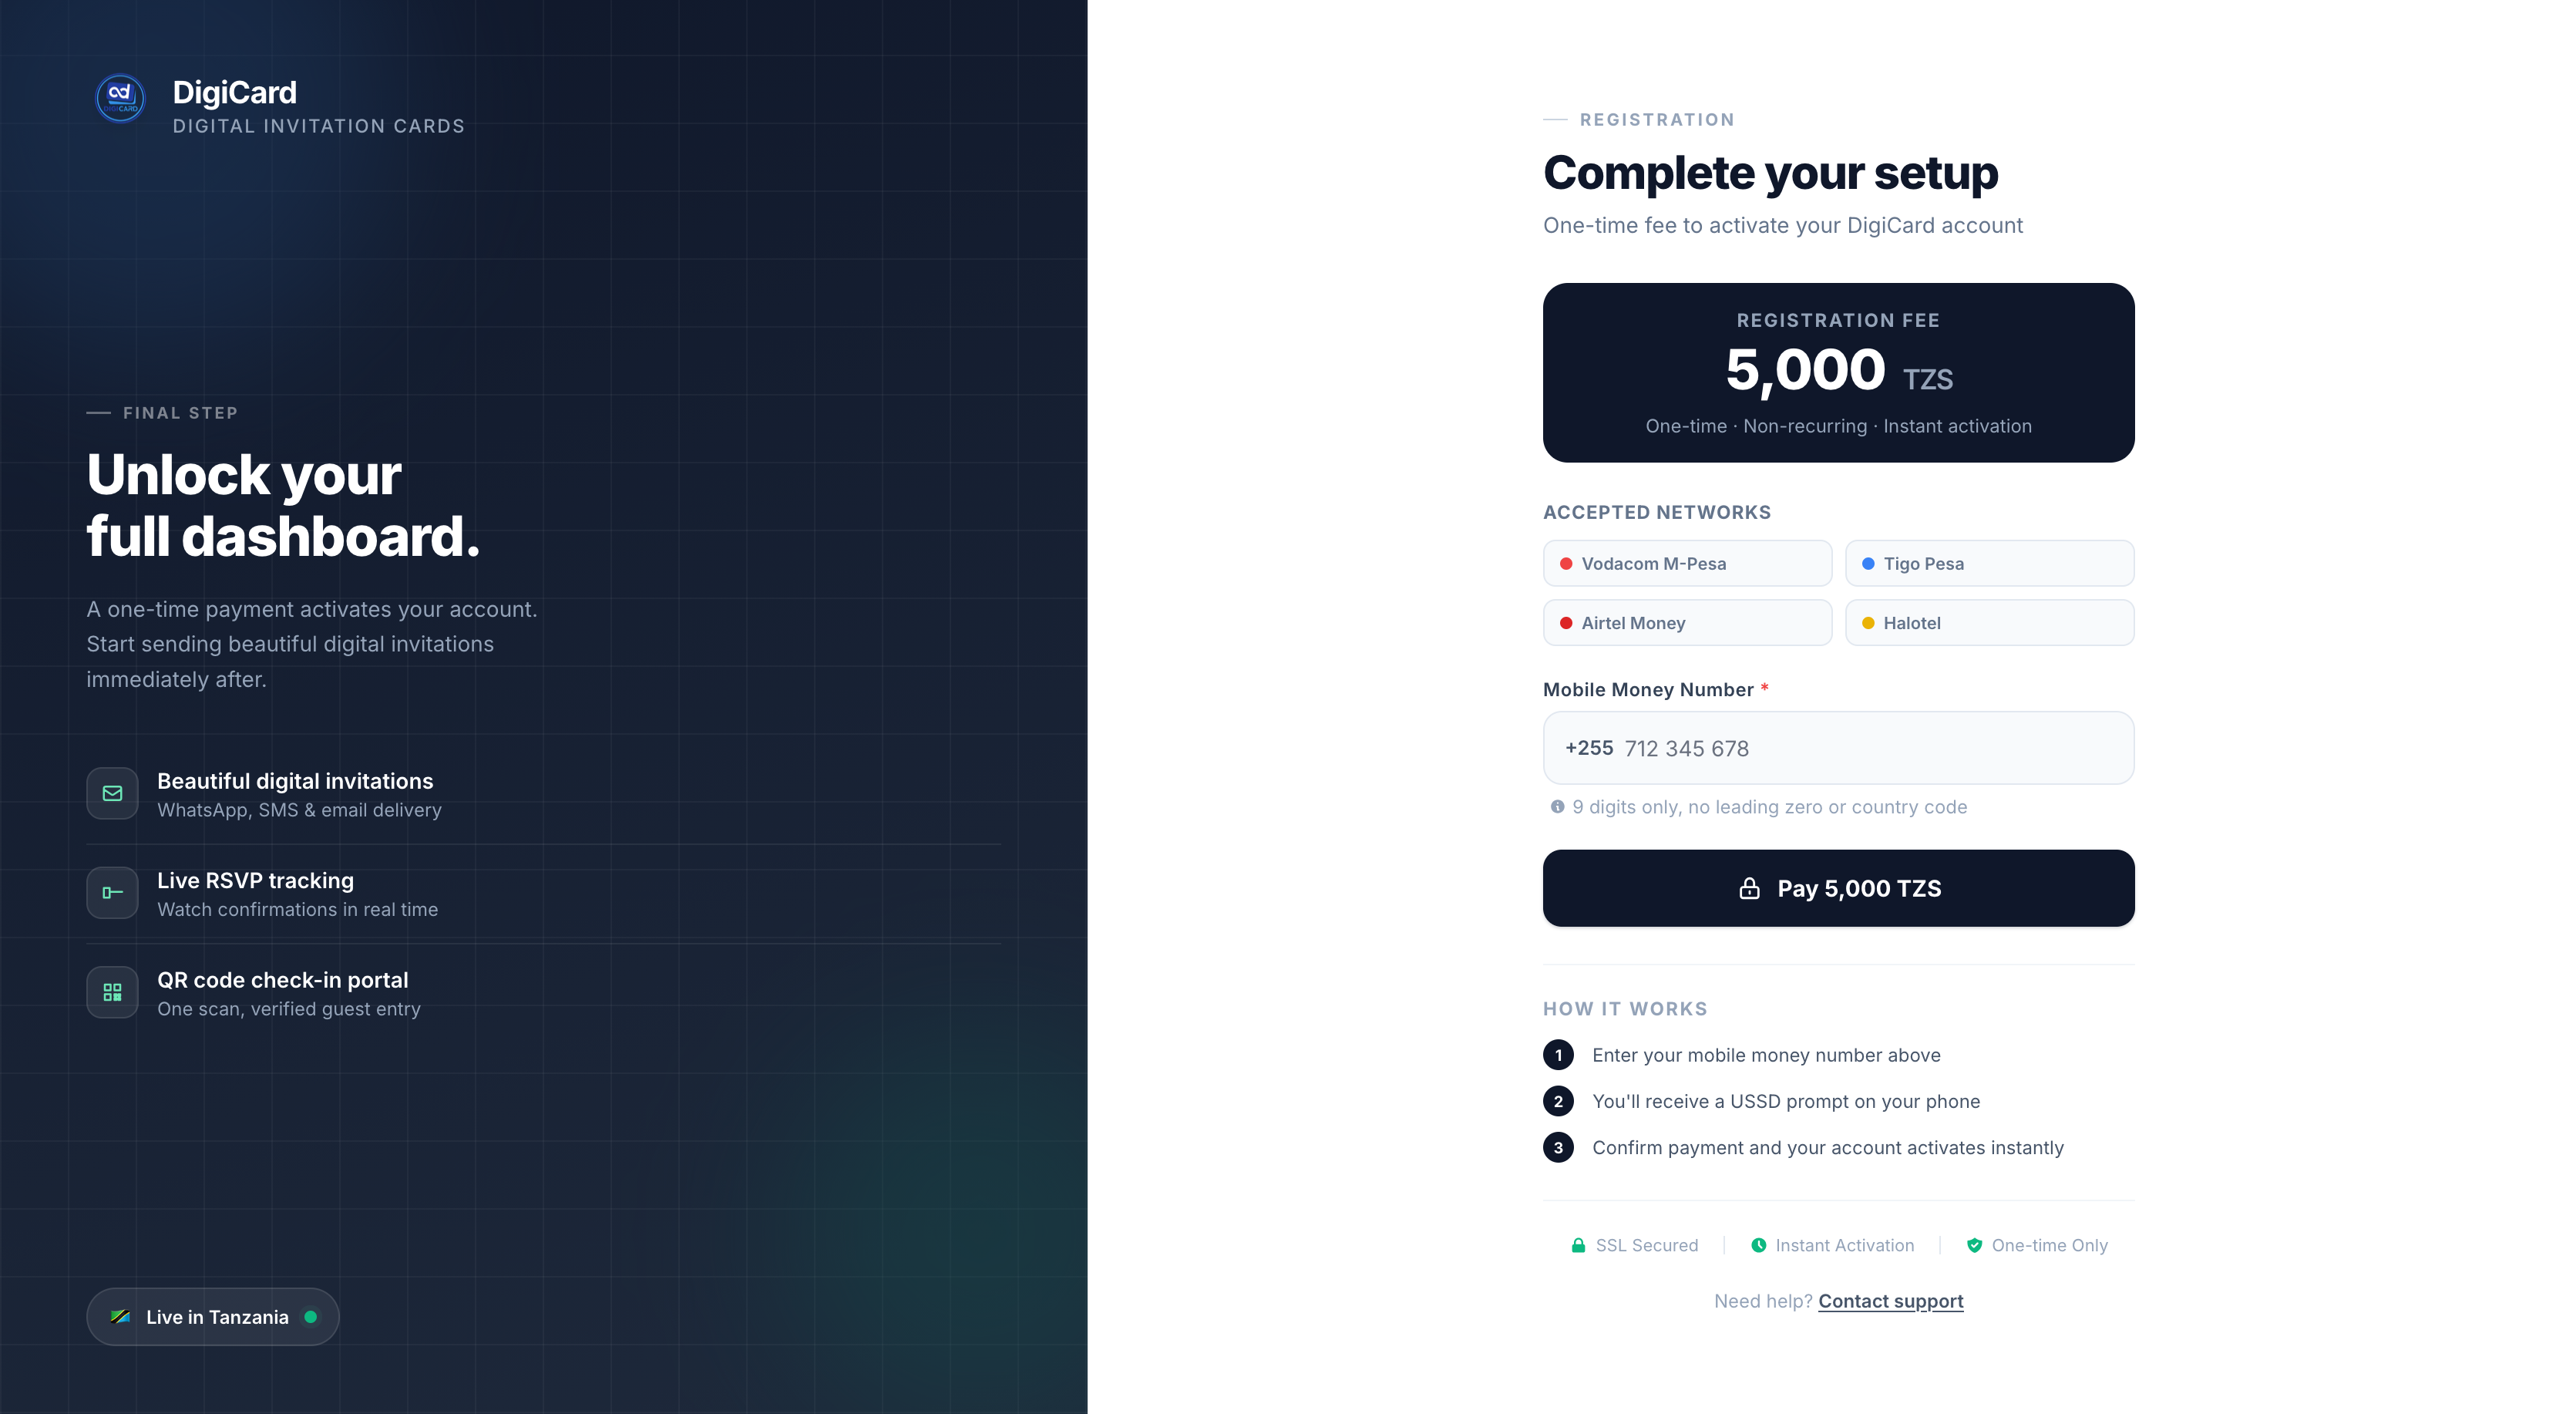
1. Registration & Account Setup
To start using DigiCard, you'll create an account, verify your email, and pay the one-time registration fee.
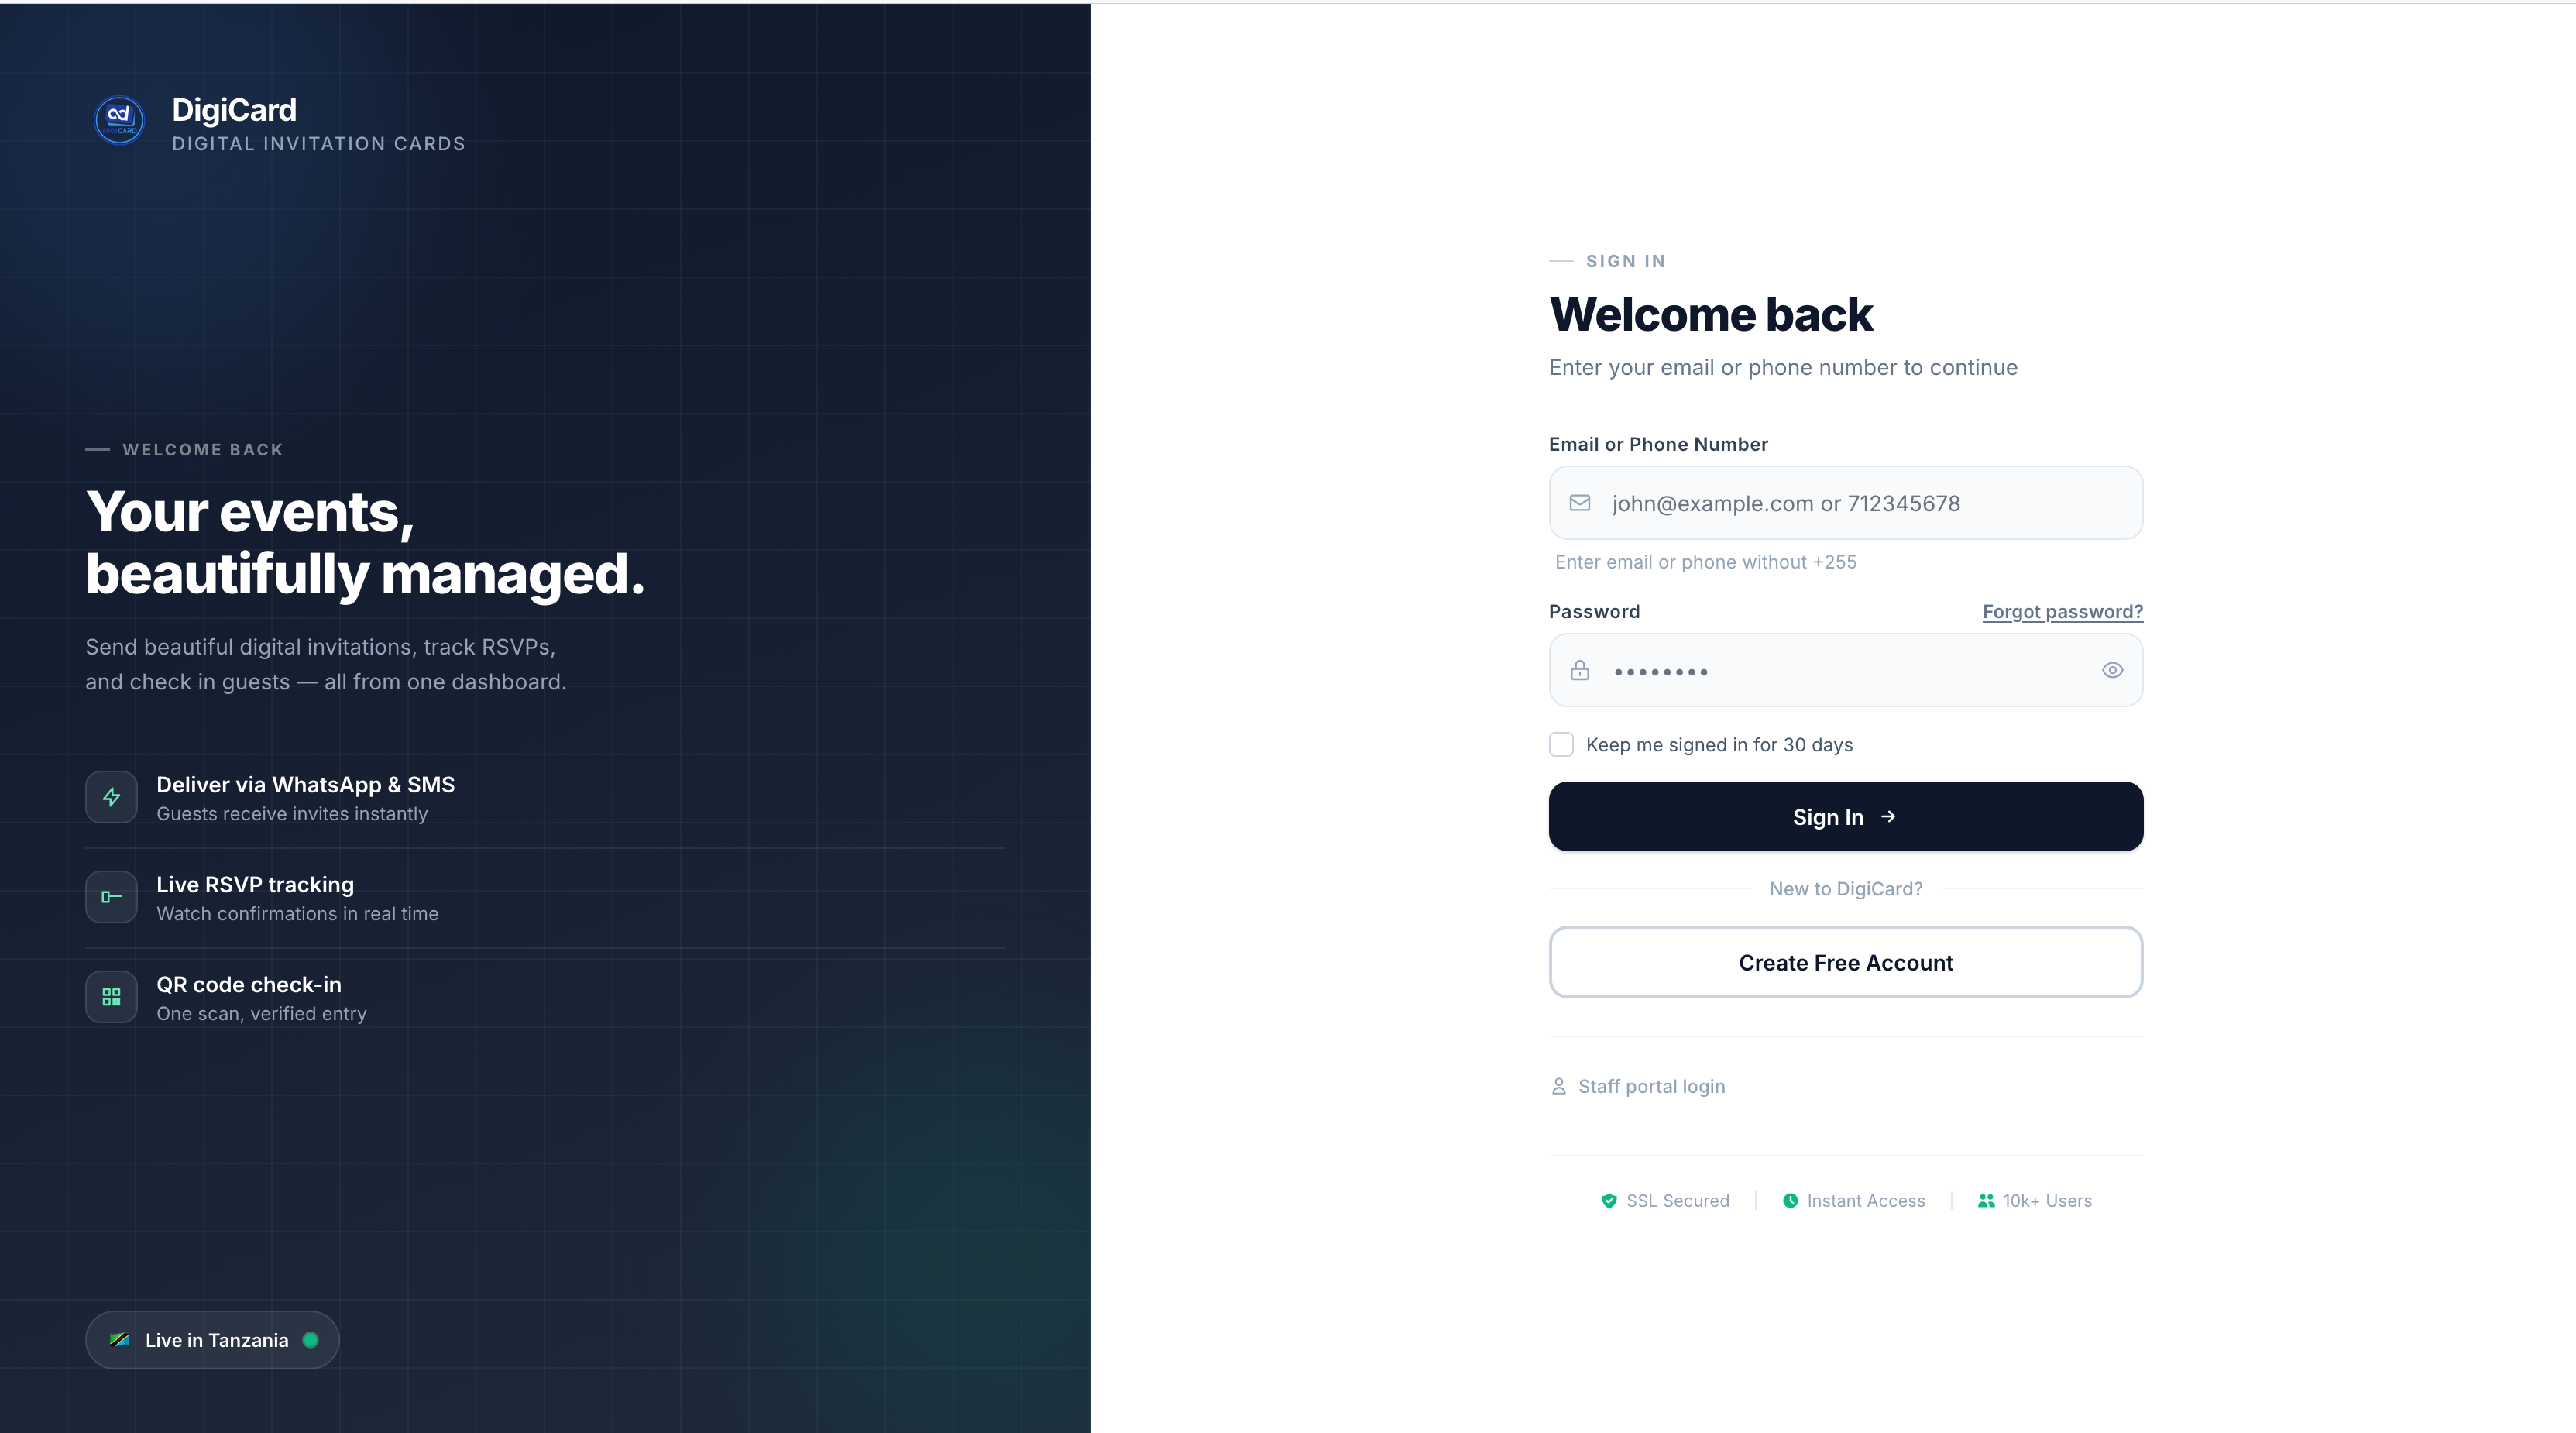
Step 1 — Create your account
-
Open the registration pageClick here or hit "Sign In" → "Create account".
-
Fill your detailsFull Name, Email, Phone Number (with country code), and a strong Password.
-
Accept & submitTick the Terms & Conditions checkbox and click Register.
Step 2 — Verify your email
Check your inbox for a verification email from DigiCard. Click Verify Email Address to confirm your account.
Step 3 — Pay the registration fee
Once verified, you'll be prompted to pay the one-time registration fee of 5,000 TZS. Enter your mobile money number to receive the payment prompt.
- Mobile money number (M-Pesa, Mixx by Yas, Airtel Money, HaloPesa).
- Approve the USSD prompt that pops up on your phone.
- Your account is fully active the moment payment confirms.
2. Dashboard Overview
After signing in, you'll land on the Dashboard — your home base.
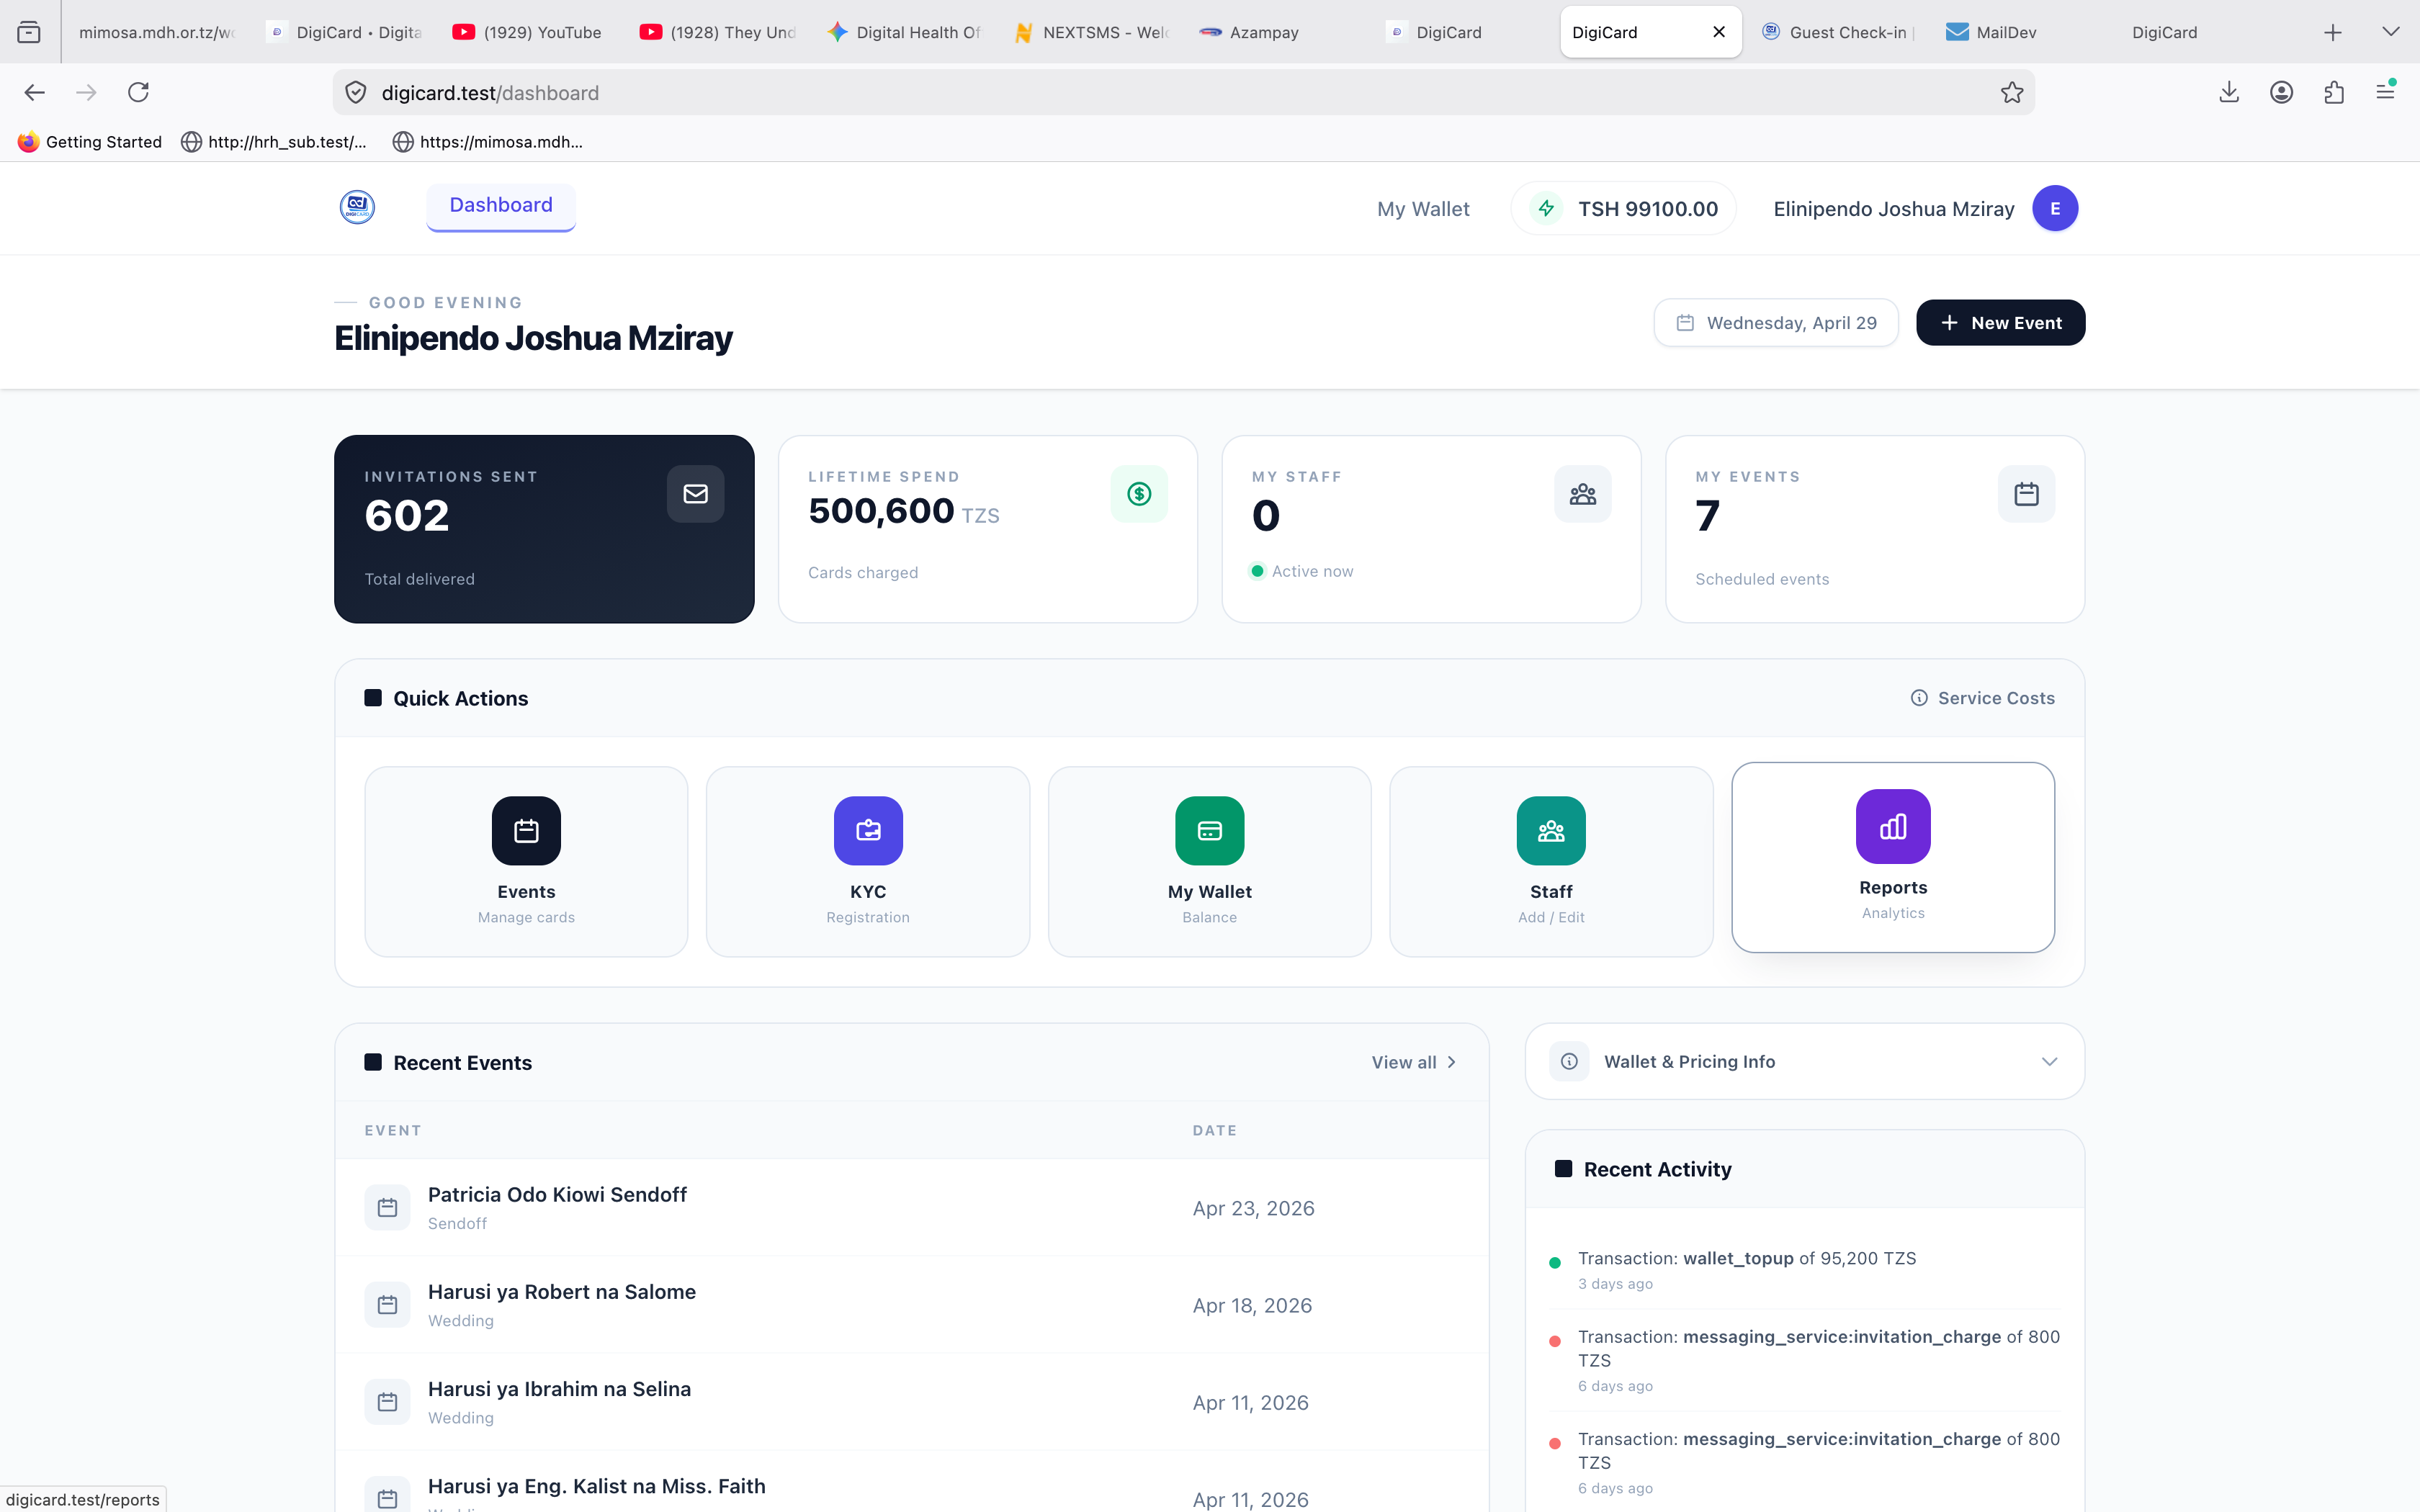
- Quick stats: Total events, invitations sent, confirmed guests, and wallet balance — all at a glance.
- Recent activity: A timeline of what's happened across your events in the last week.
- Quick actions: Jump straight into creating an event, managing staff, or topping up your wallet.
3. Creating Events
Set up your event details before inviting guests.
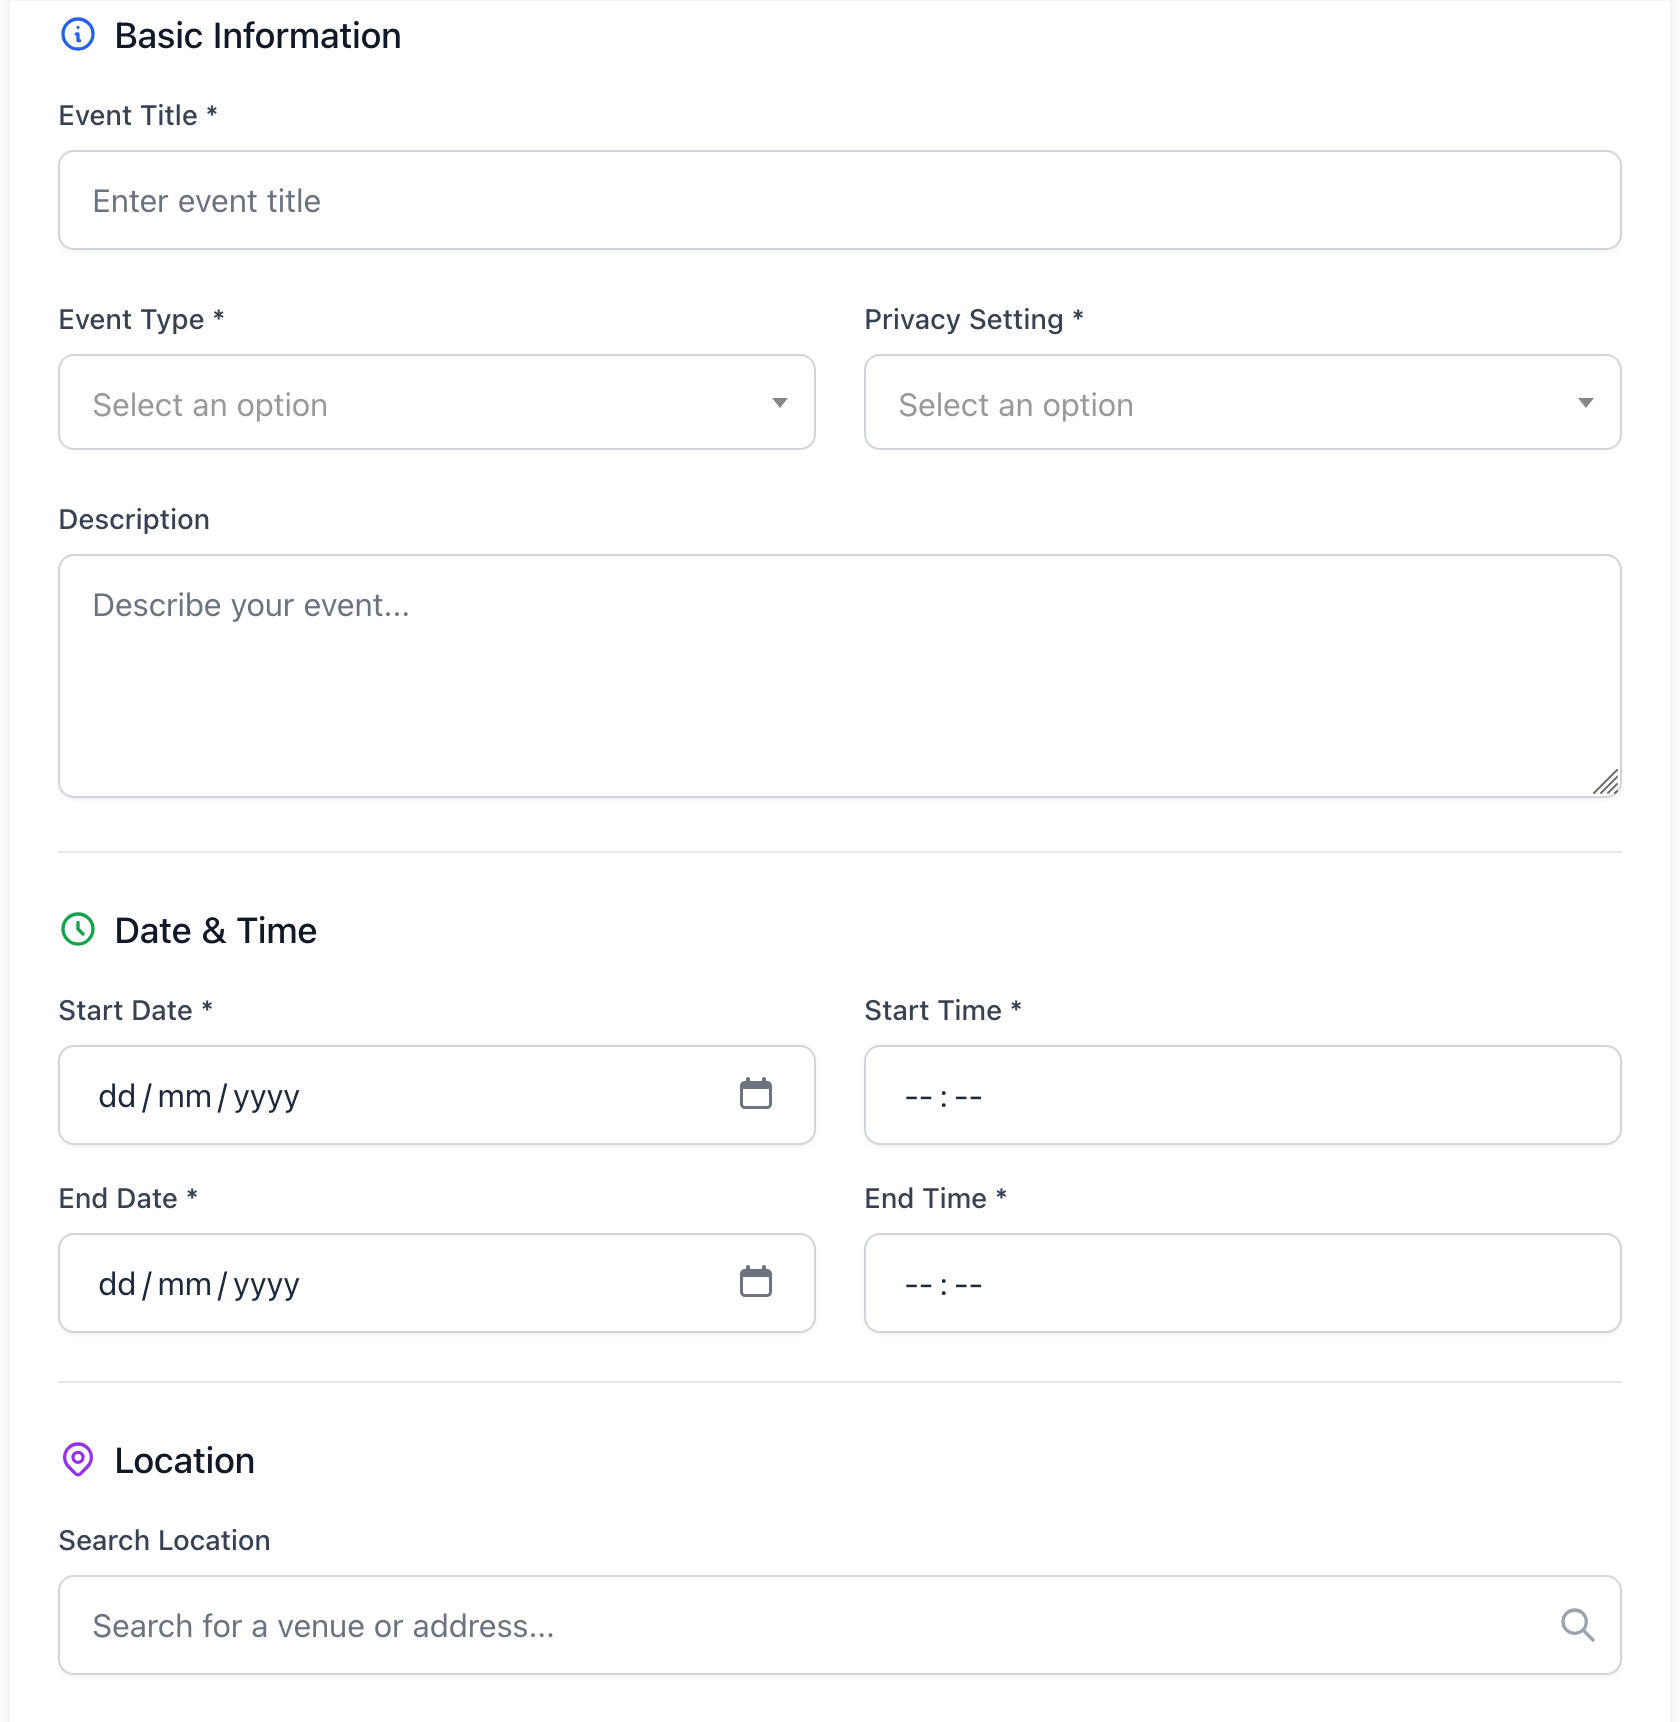
-
Open the formNavigate to Events → Create New.
-
Event detailsEnter a title (e.g., "Sarah's Wedding"). Picking an Event Type may unlock extra fields relevant to that occasion.
-
ScheduleSet Start and End date/time. Start must be today or later; End must be after Start.
-
LocationSearch for the venue — if found, the address and coordinates auto-fill. Otherwise, enter the address manually.
-
SaveClick Create Event. You'll land on the event details page.
4. Managing Events
View and manage all your active events from one place.
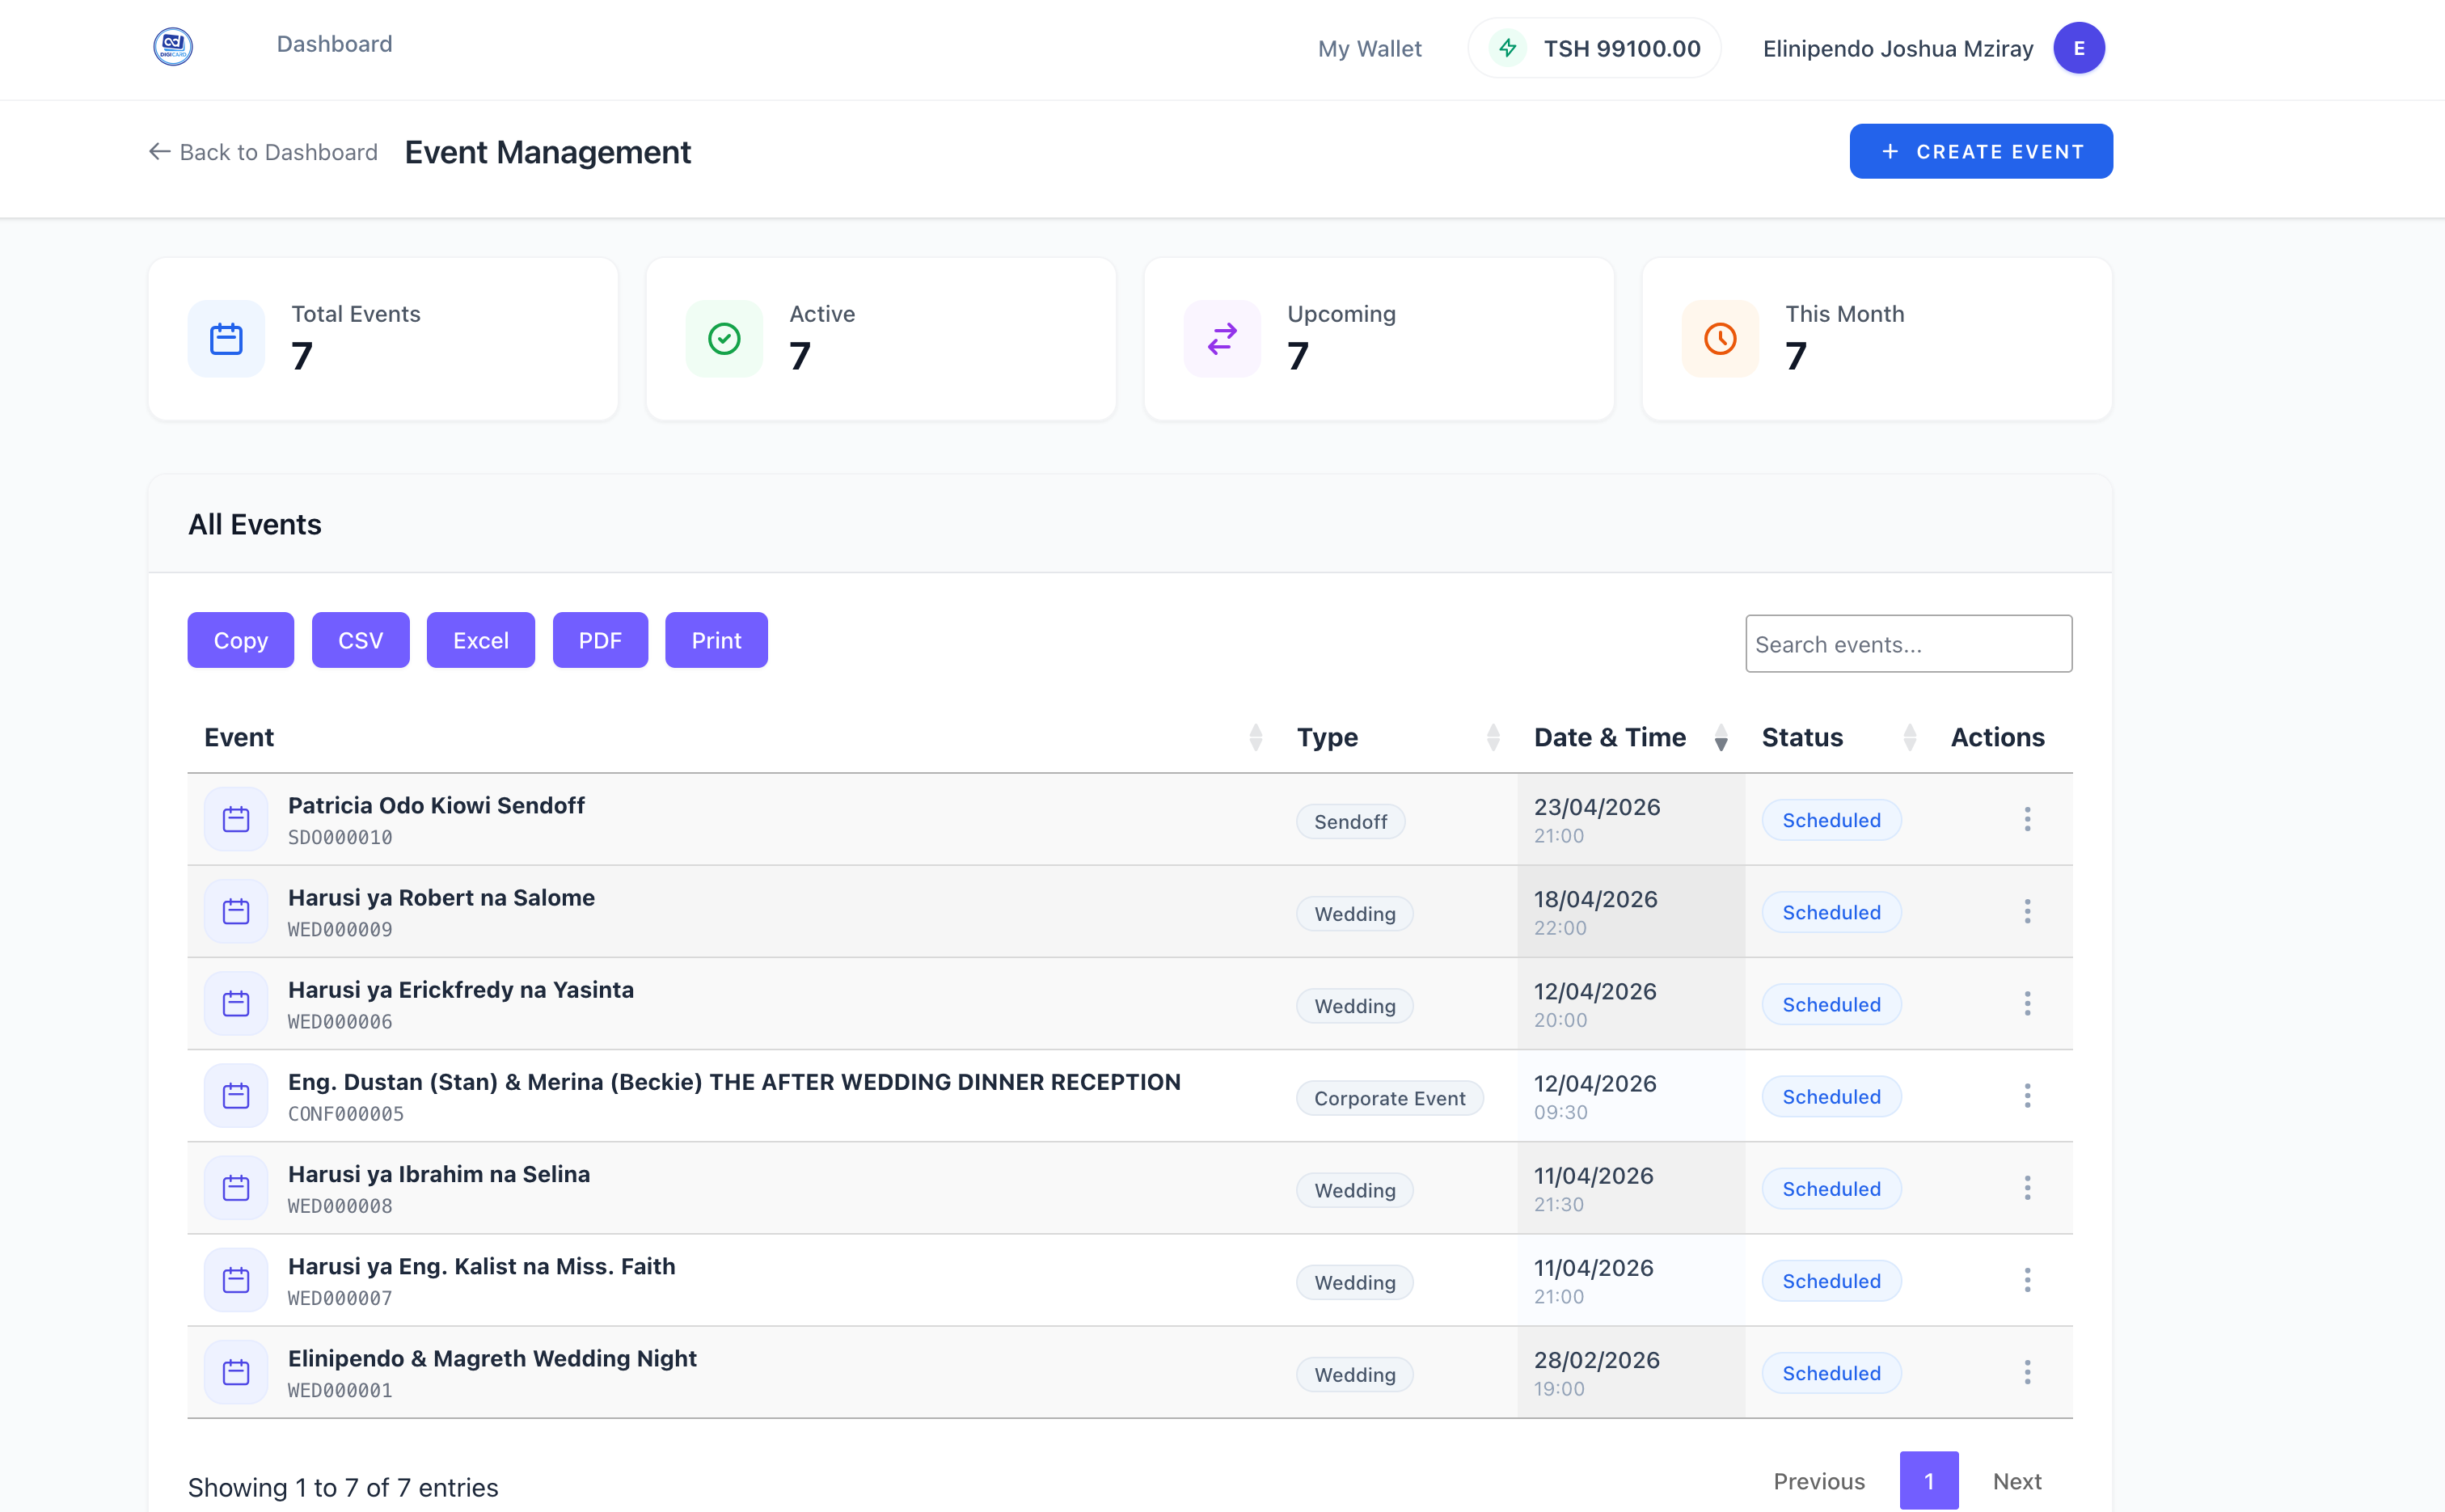
What you can do
- View: Open the event to see full details, the guest list, and live RSVP status.
- Edit: Update title, schedule, or location at any time.
- Delete: Permanently remove the event — this cannot be undone.
5. Managing Guests
Add guests one-by-one, or import hundreds at once with a CSV.
Adding a single guest
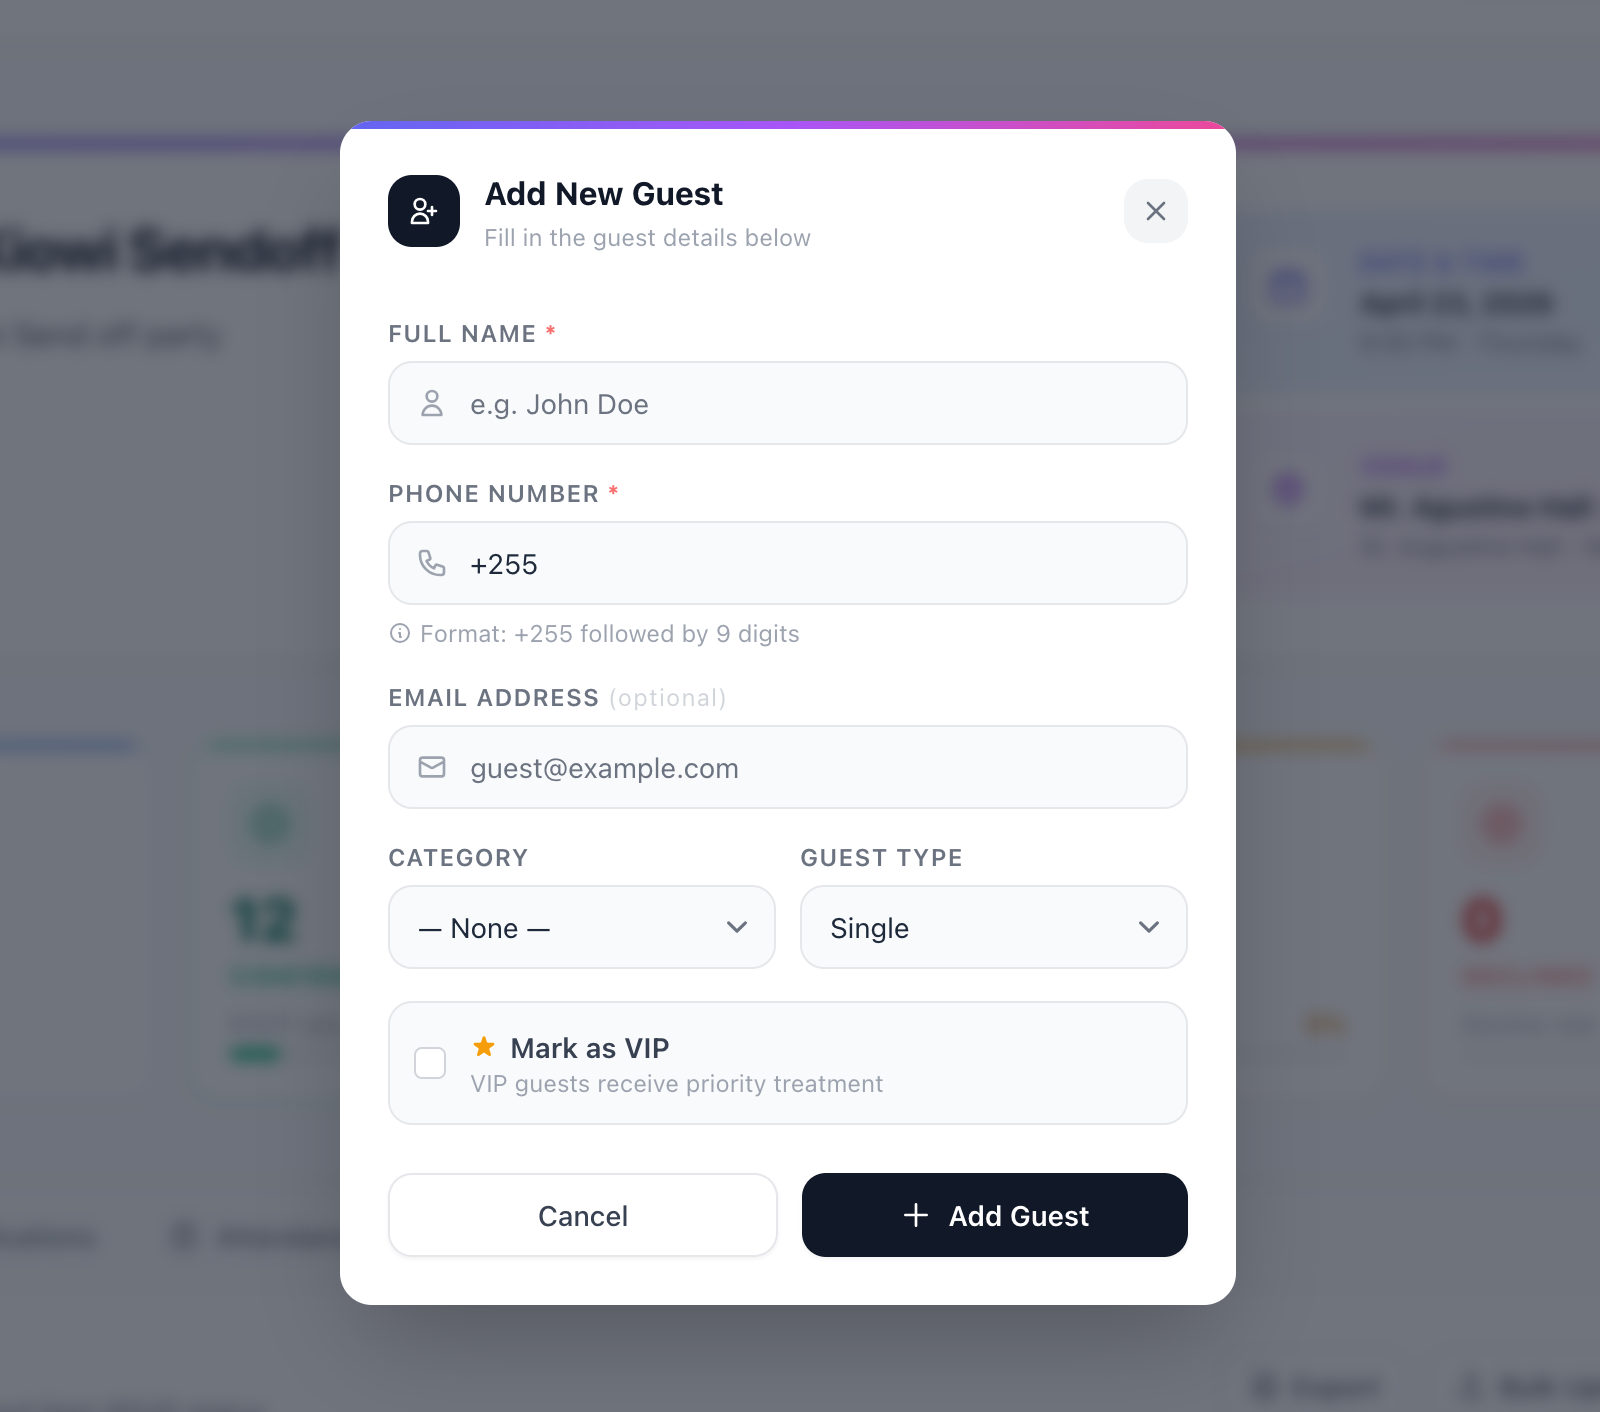
Enter the guest's Name and Phone Number. Phone numbers must start with +255 (e.g., +255712345678).
Guest list actions
In the Action column of the guest list, you have several options:
- Edit: Correct a name or phone number.
- Delete: Remove a guest from the list.
- Resend invite: If a message failed or wasn't seen, send it again individually.
Bulk import
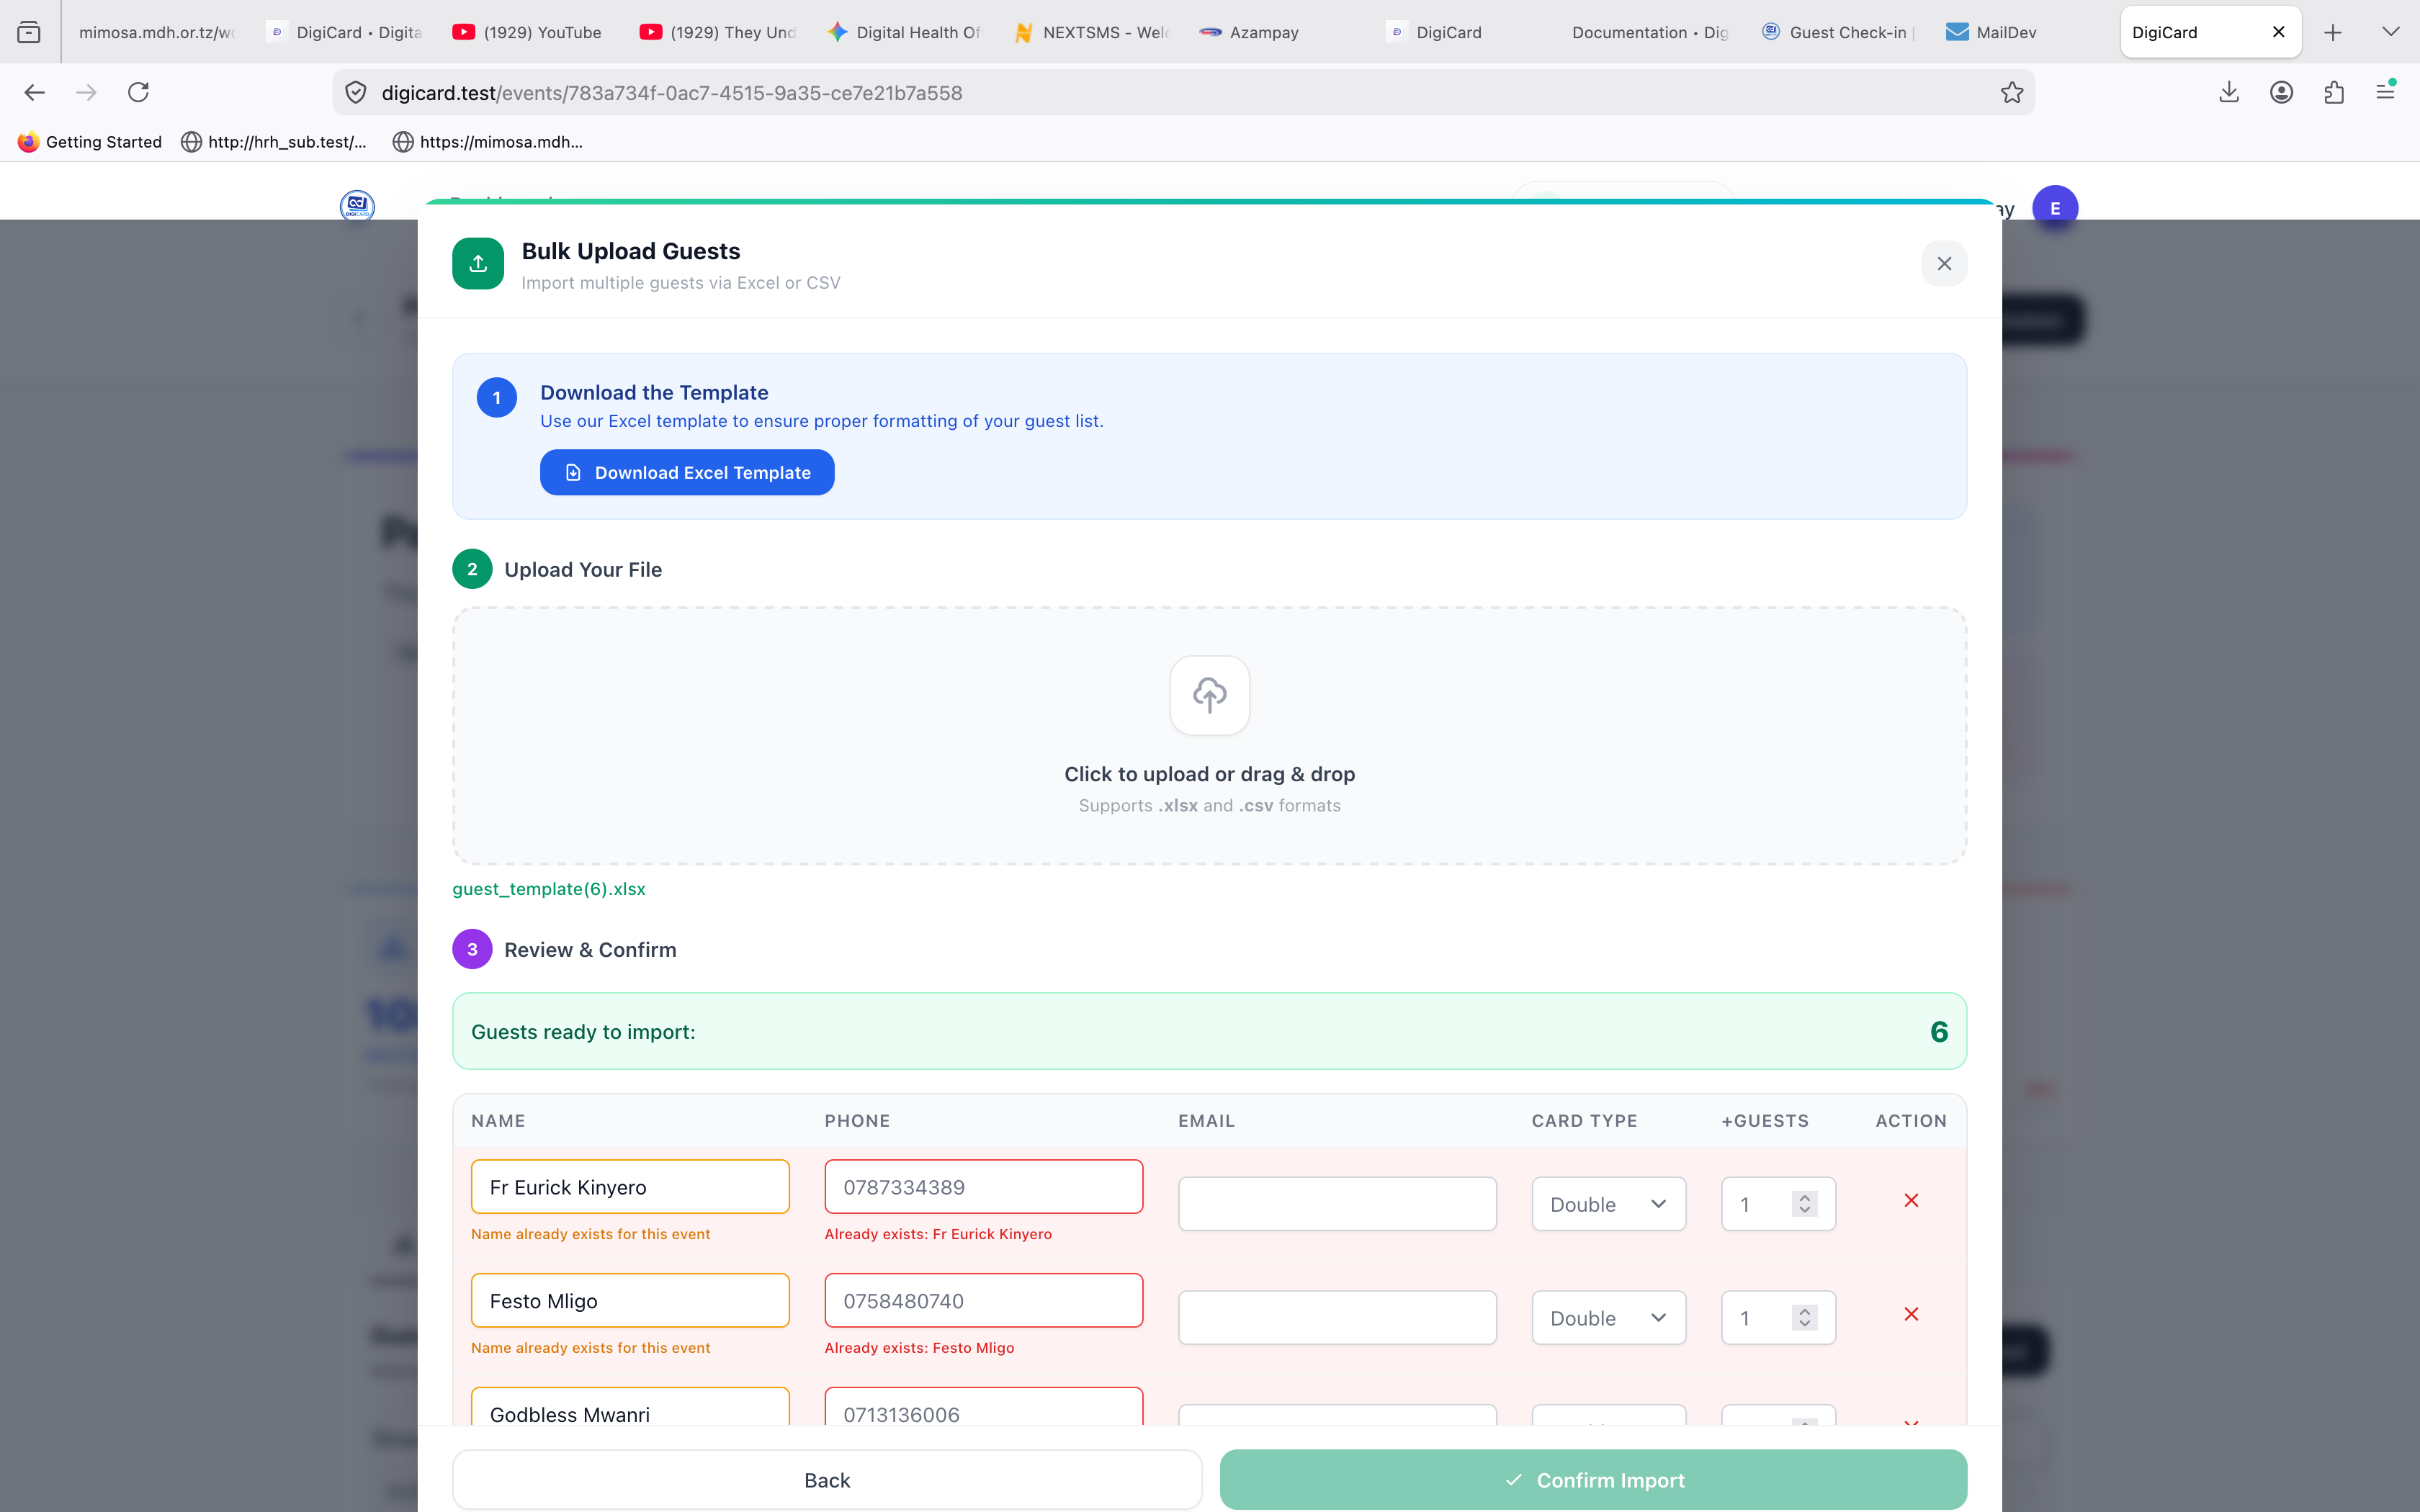
-
Click Import GuestsFrom the guests tab on any event.
-
Download the templateUse the provided CSV template — it has the right column headers.
-
Fill in your dataName (required) and Phone in the format
+255...(required). -
UploadSave as
.csvand drop it in. Errors are shown row-by-row before the import runs.
6. Designing Invitation Cards
Customize your invitation card with the interactive designer.
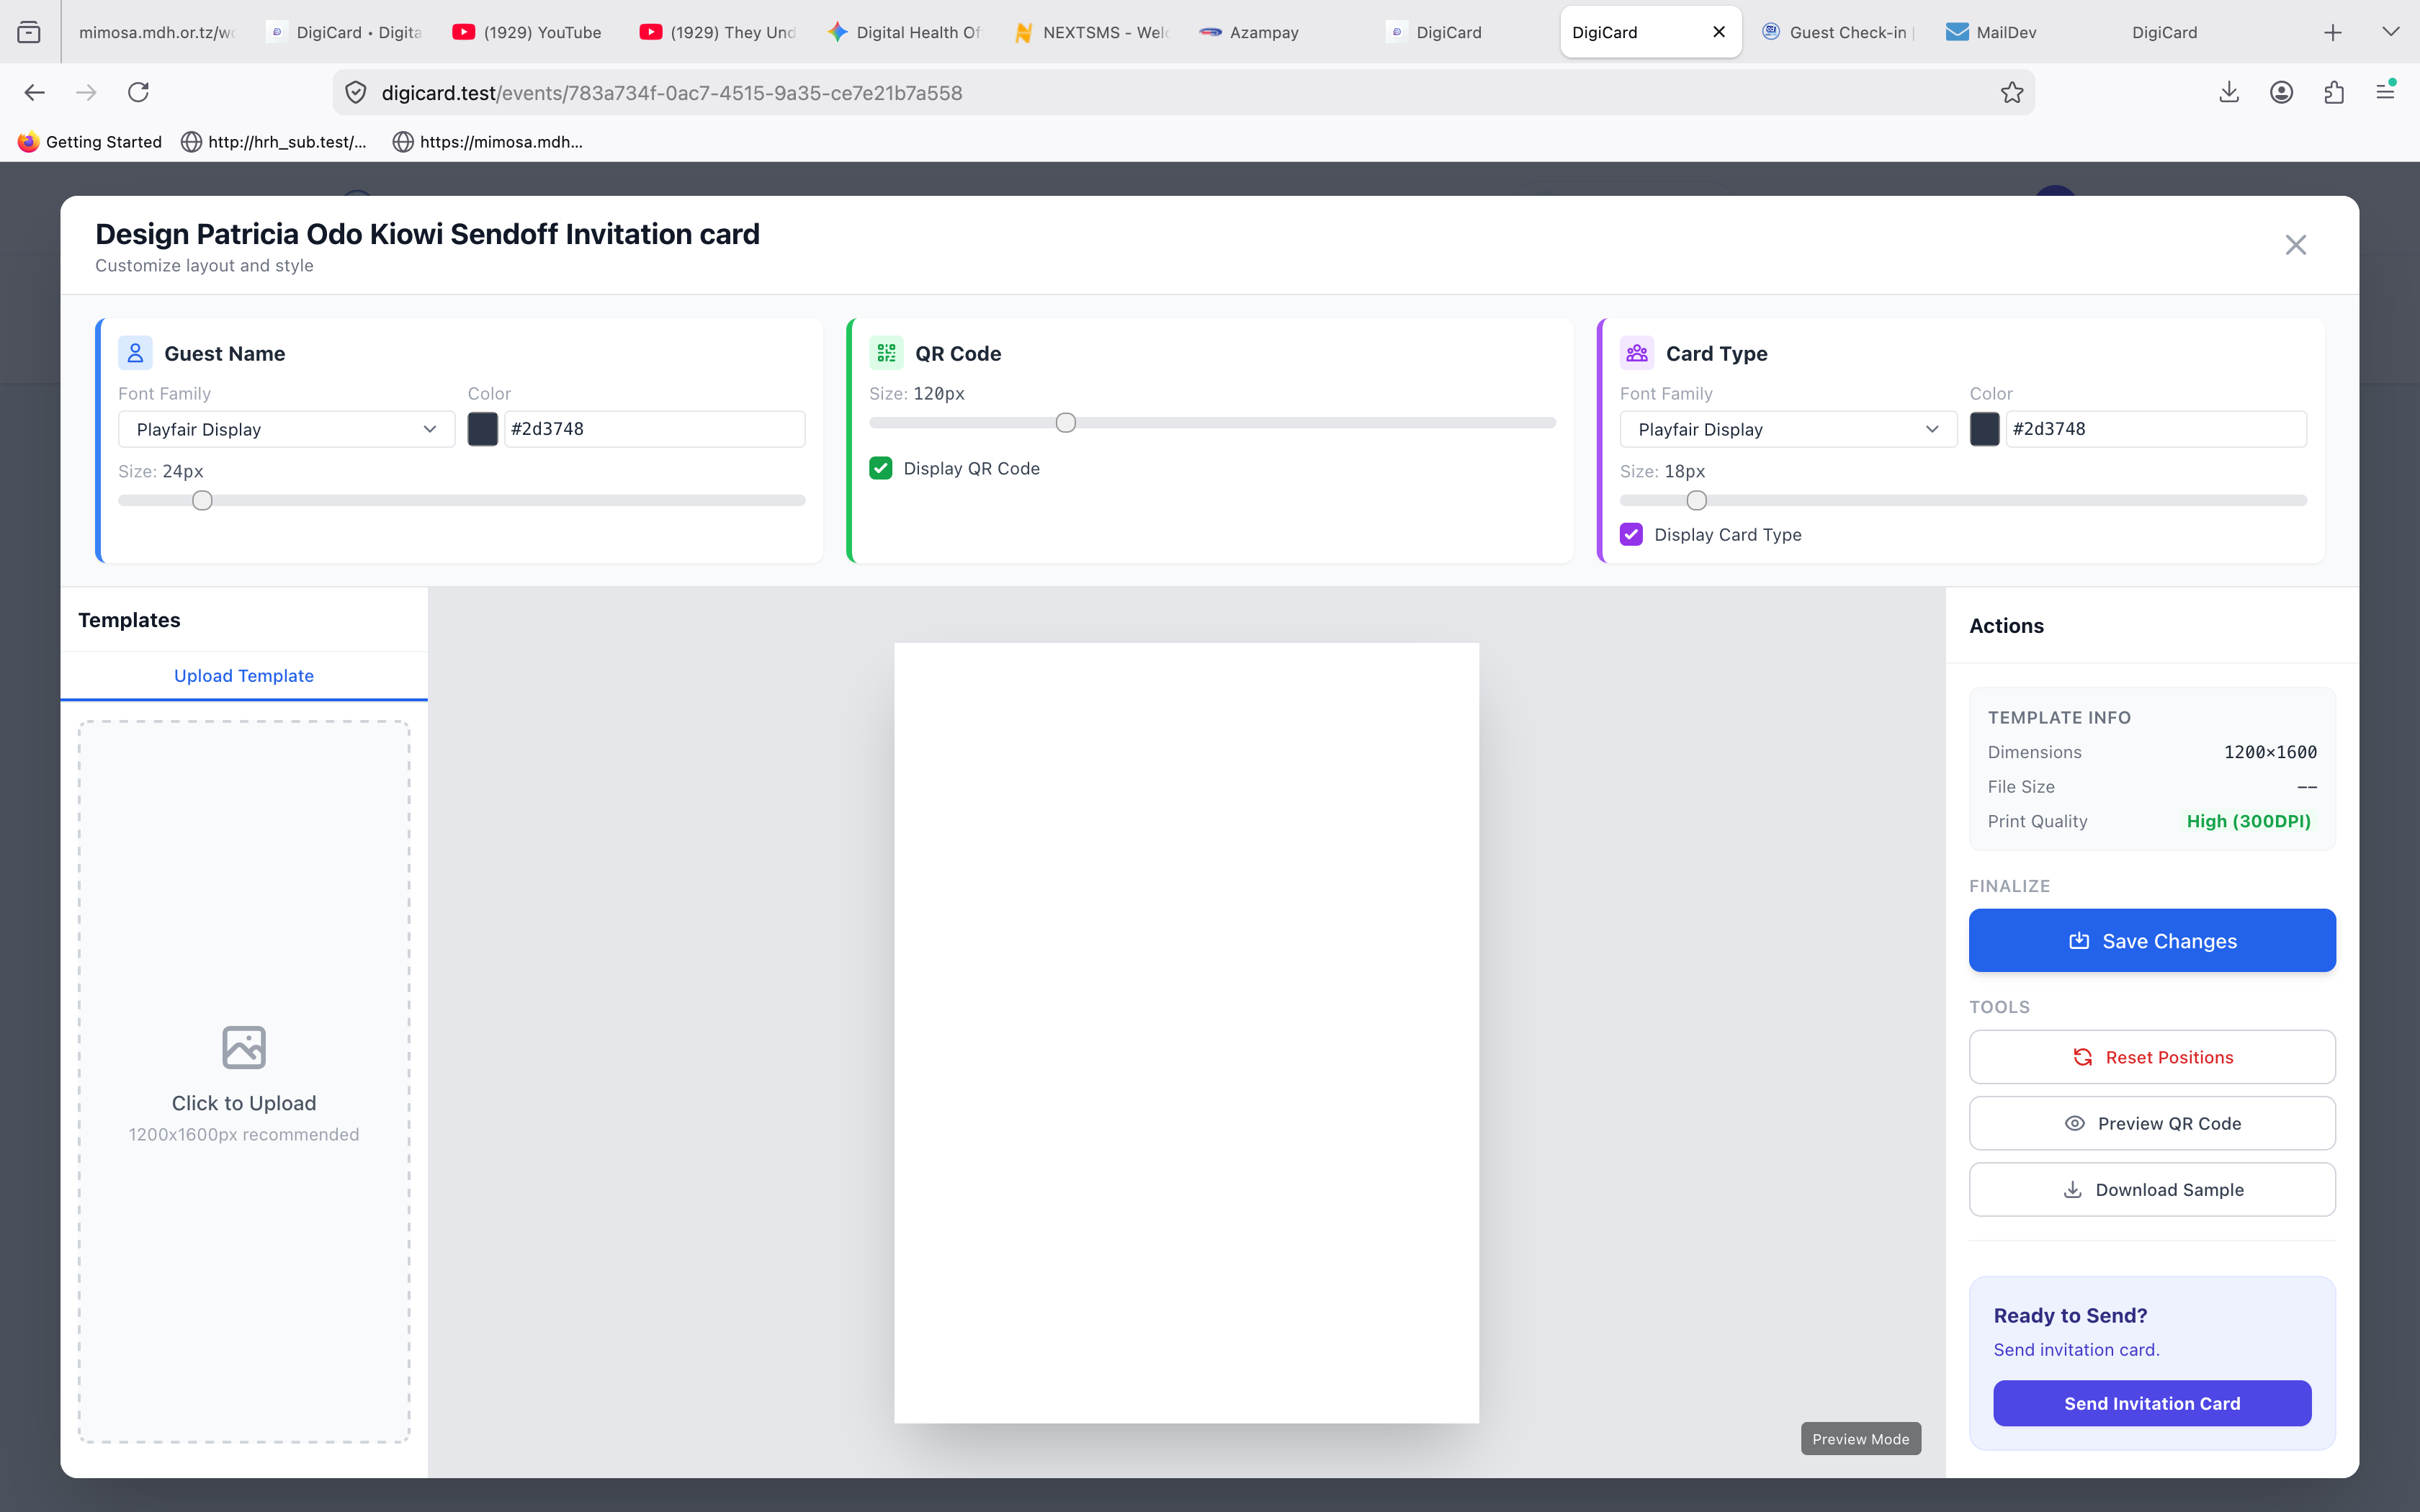
Design tools
- Upload template: Click Upload Image to use your own custom card design (JPG/PNG).
- Adjust QR position: Drag and drop the QR placeholder, then resize it to fit.
- Guest name position: Move the name placeholder so it lands inside your design.
- Card type: Pick a template style (Standard, Premium) if applicable.
Saving & sending
When you're happy with the layout, click Save changes. You can then click Send Invitation right from this screen to open the sending modal.
7. Sending Invitations
Deliver invitations via WhatsApp or SMS.
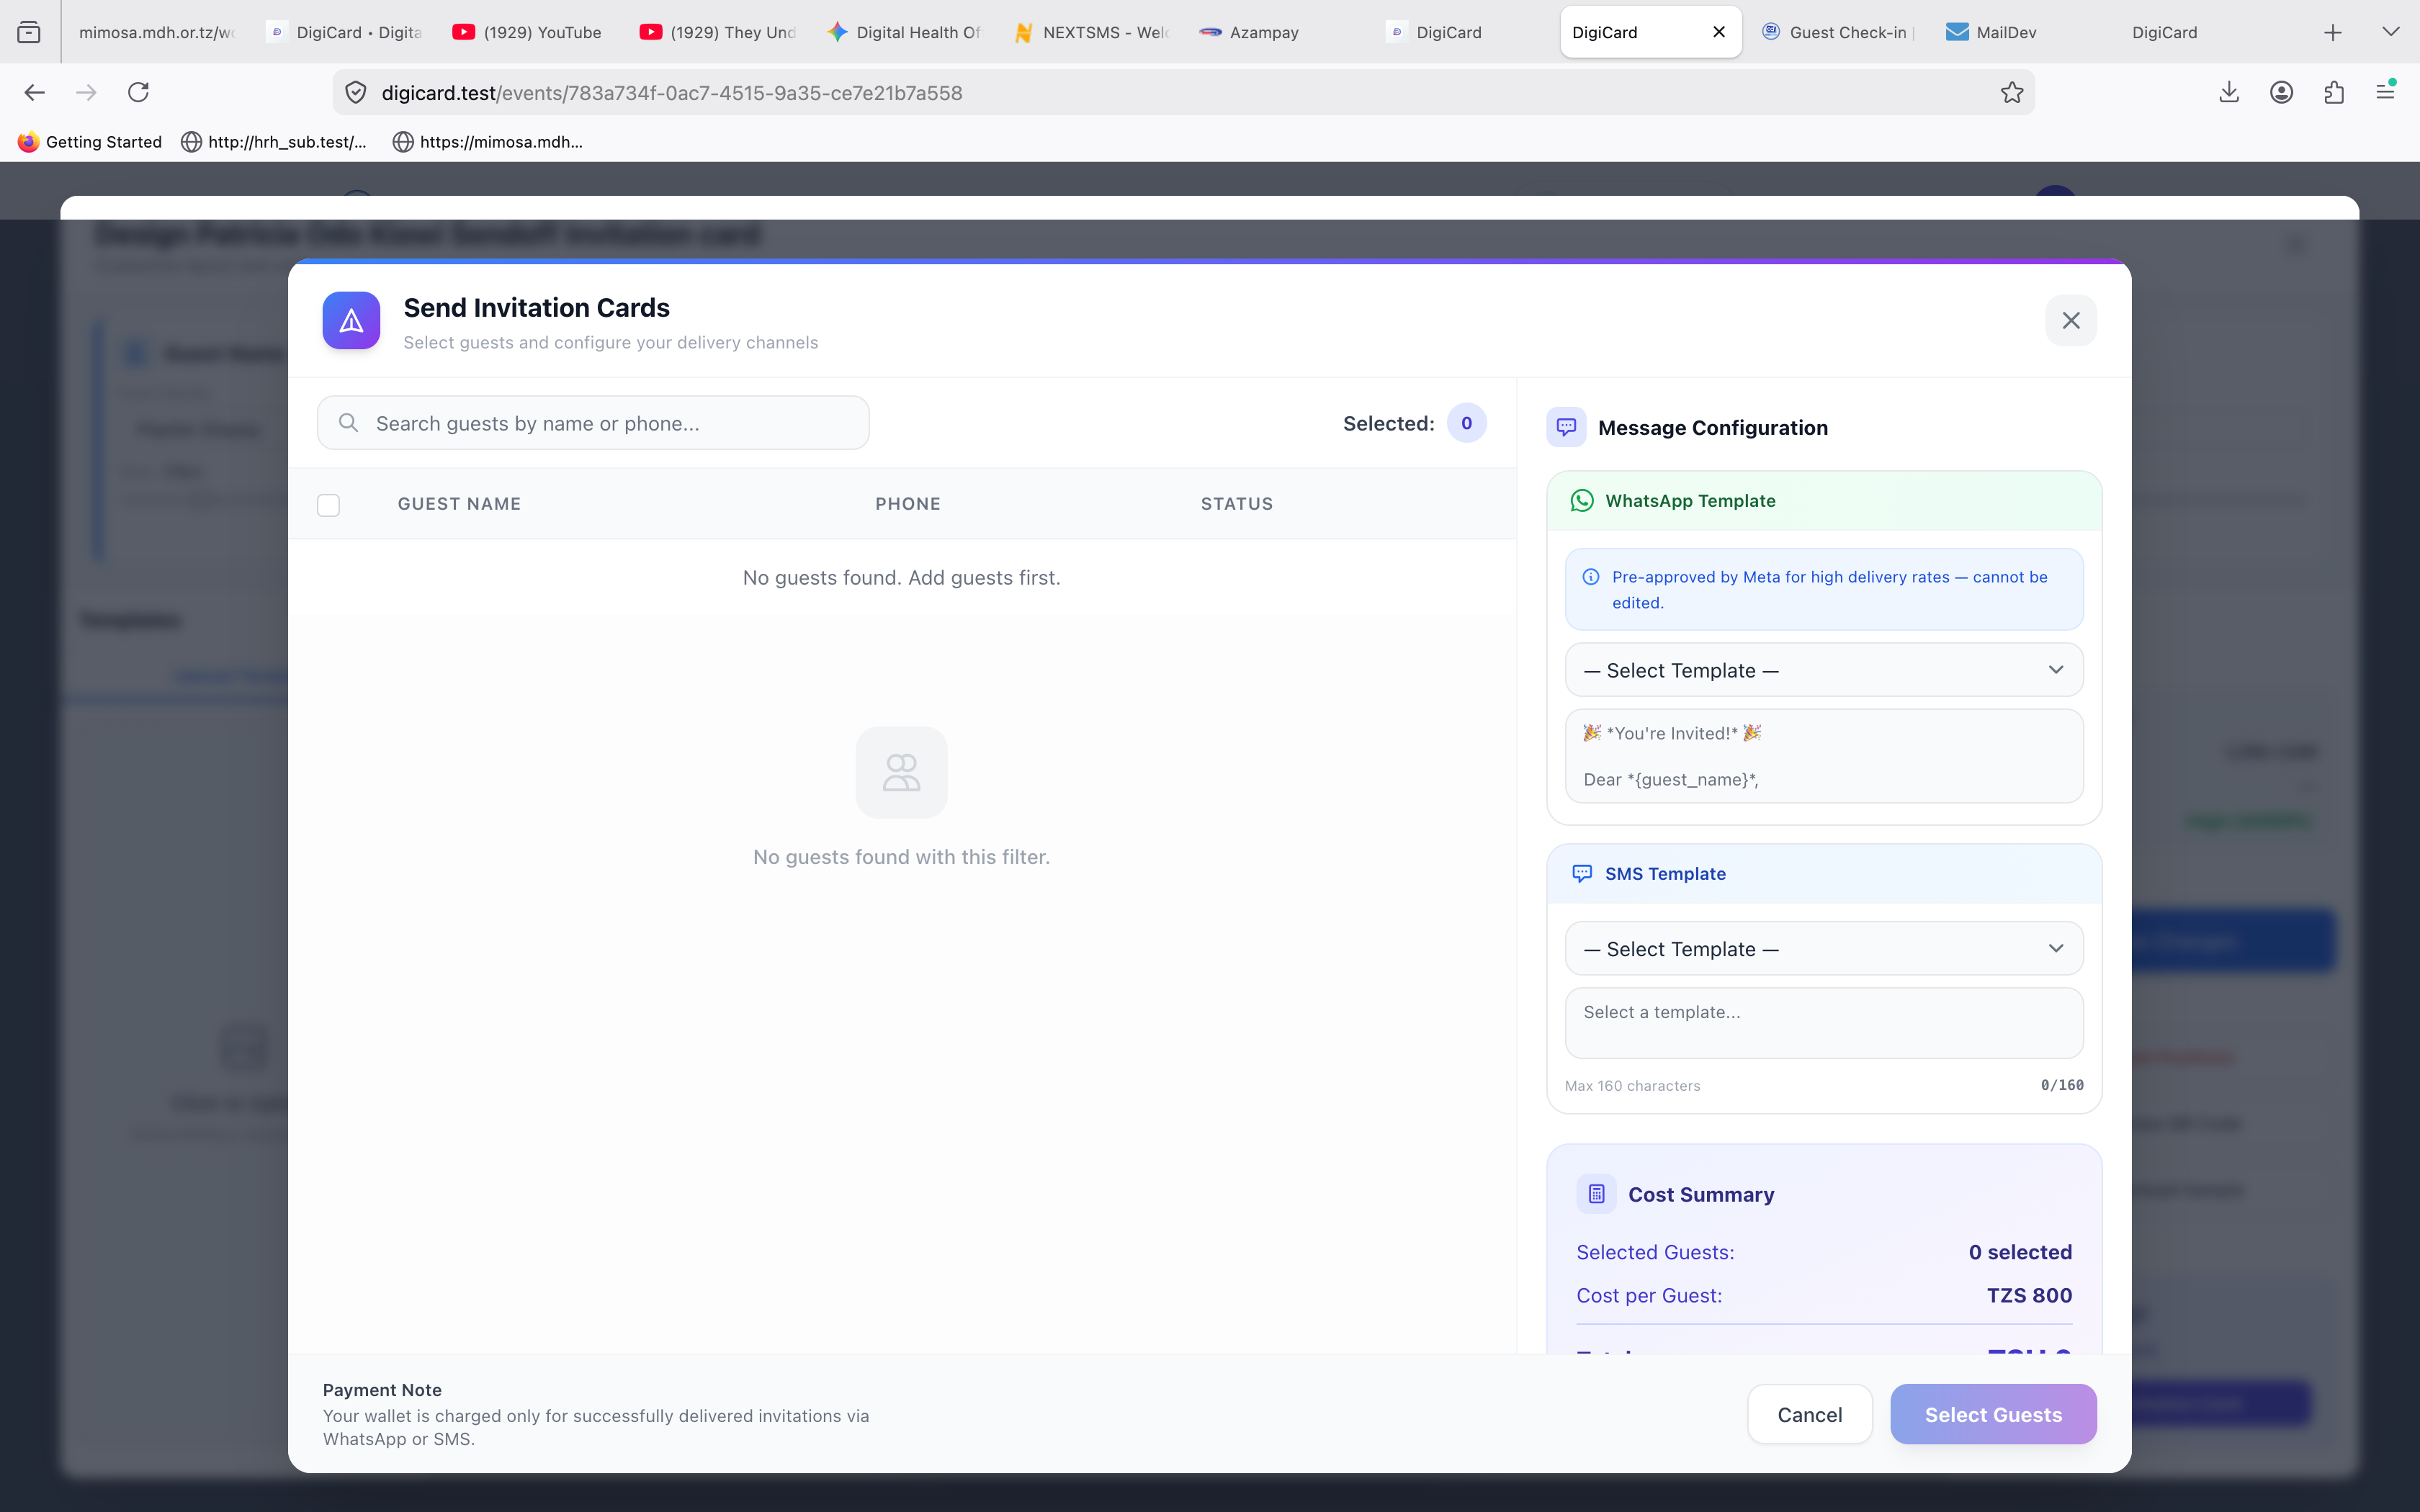
Send to all guests at once
Use the Bulk Send option to deliver invitations to your entire guest list simultaneously via WhatsApp or SMS.

-
Open the eventFrom Event Details, click Design Invitation.
-
Save your designCustomize your card and click Save changes.
-
Open the senderClick Send Invitation on the design page.
-
Pick recipients & channelSelect guests (or "Select All"), pick WhatsApp or SMS, review the template.
-
Confirm & sendReview the cost, confirm, click Send. Messages queue and deliver instantly.
8. Attendance & Check-in
Track guest attendance in real-time with our digital check-in tools.
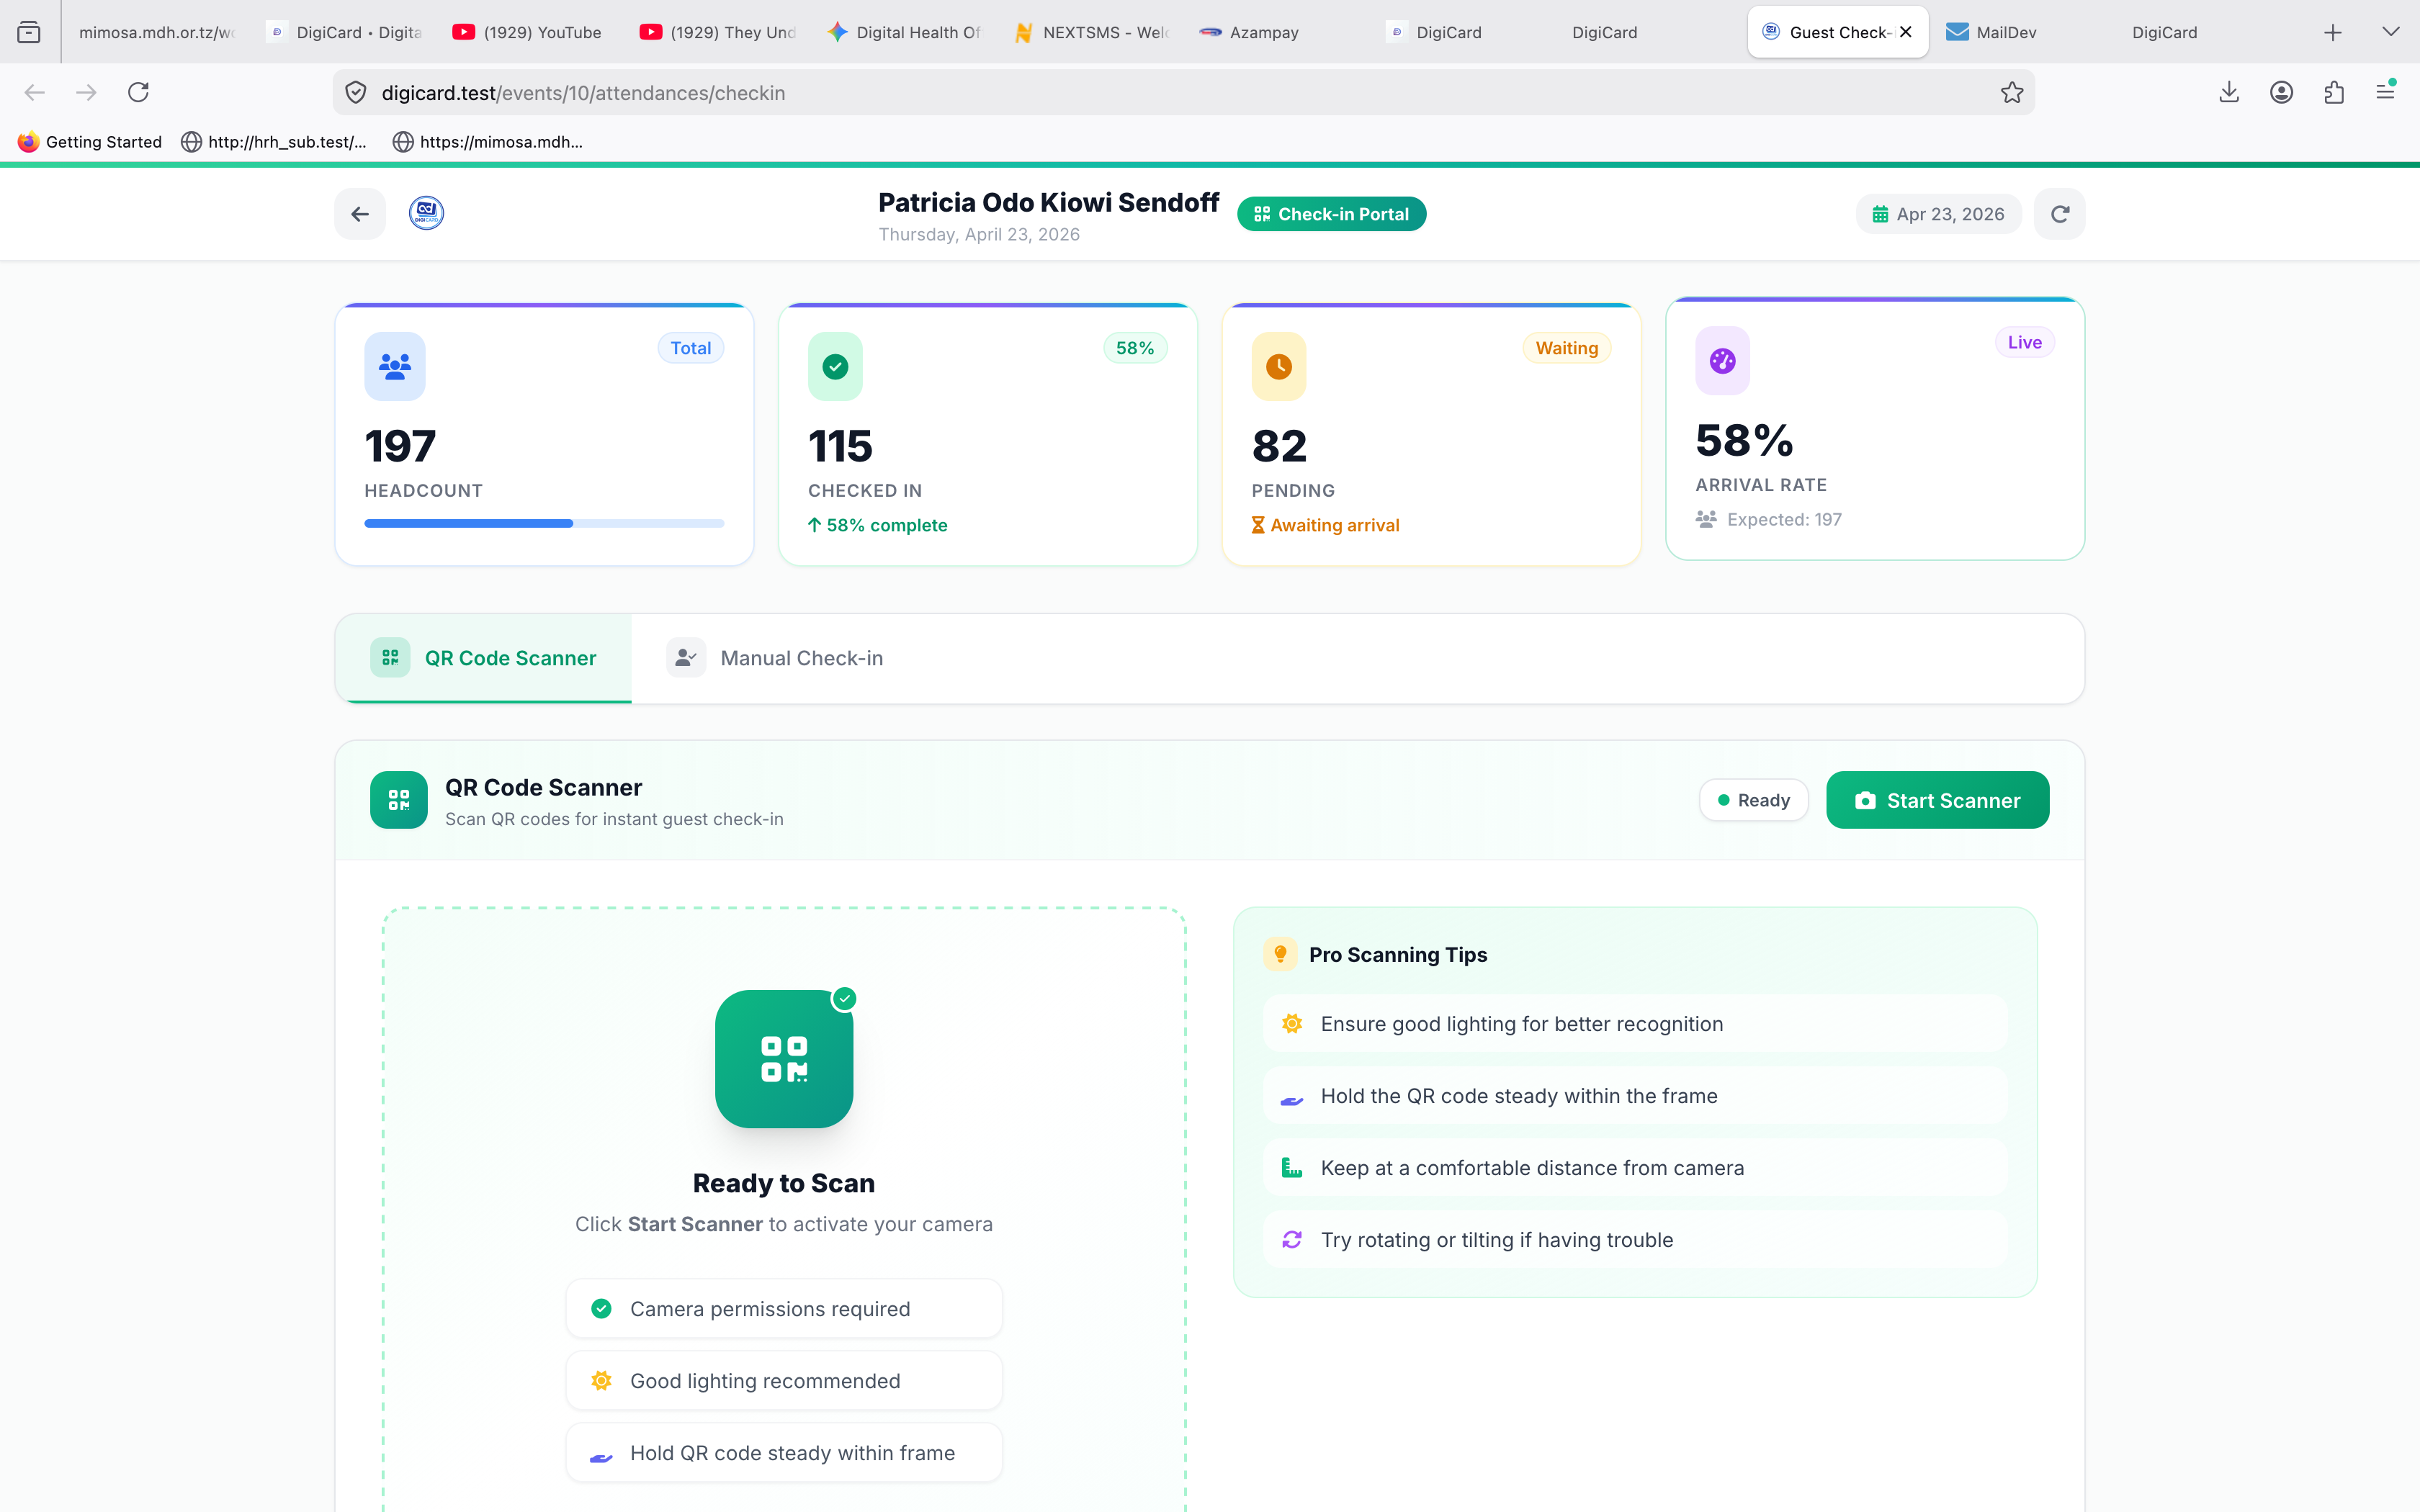
Scan QR Code
The fastest way to check guests in:
-
Open the Attendance tabFrom your event dashboard.
-
Tap Scan QR CodeA dedicated scanning page opens.
-
Aim the cameraPoint at the QR code on the guest's invitation (digital or printed).
-
DoneThe system instantly verifies the guest and marks them Checked In.
Manual check-in
If a guest doesn't have their QR code:
-
Tap Manual Check-in
-
Search by name or phoneType and pick the guest from the dropdown.
-
ConfirmClick Check In Guest.
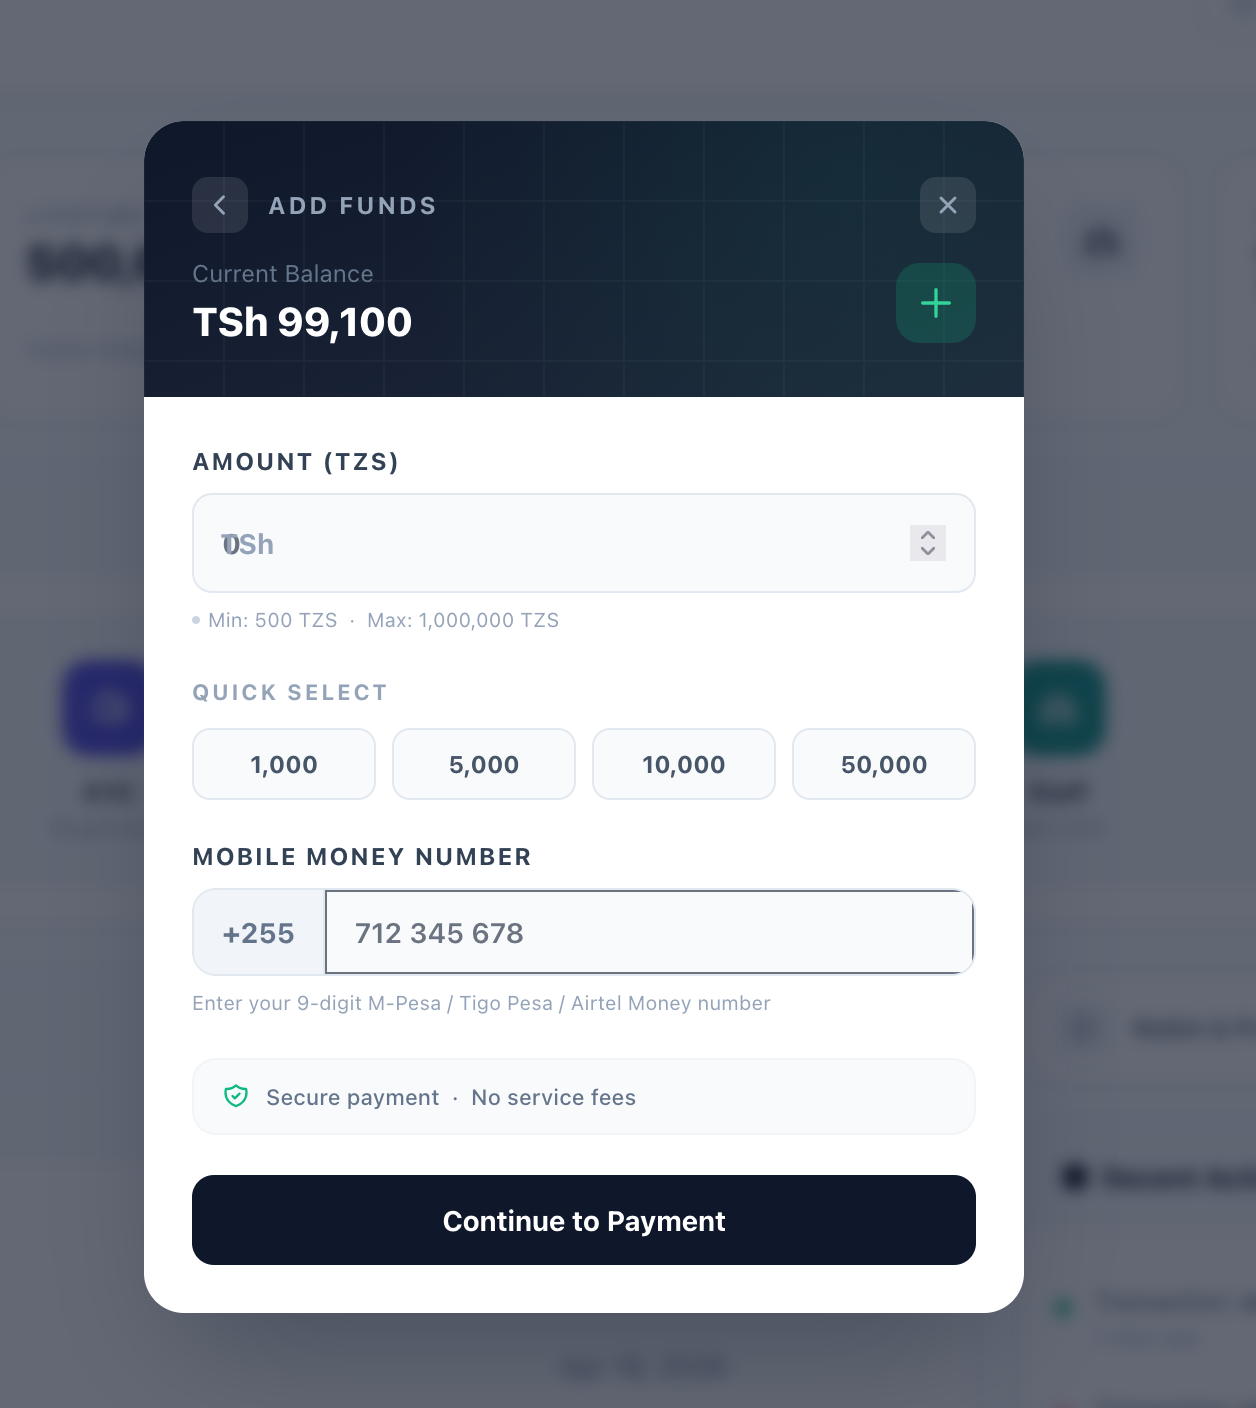
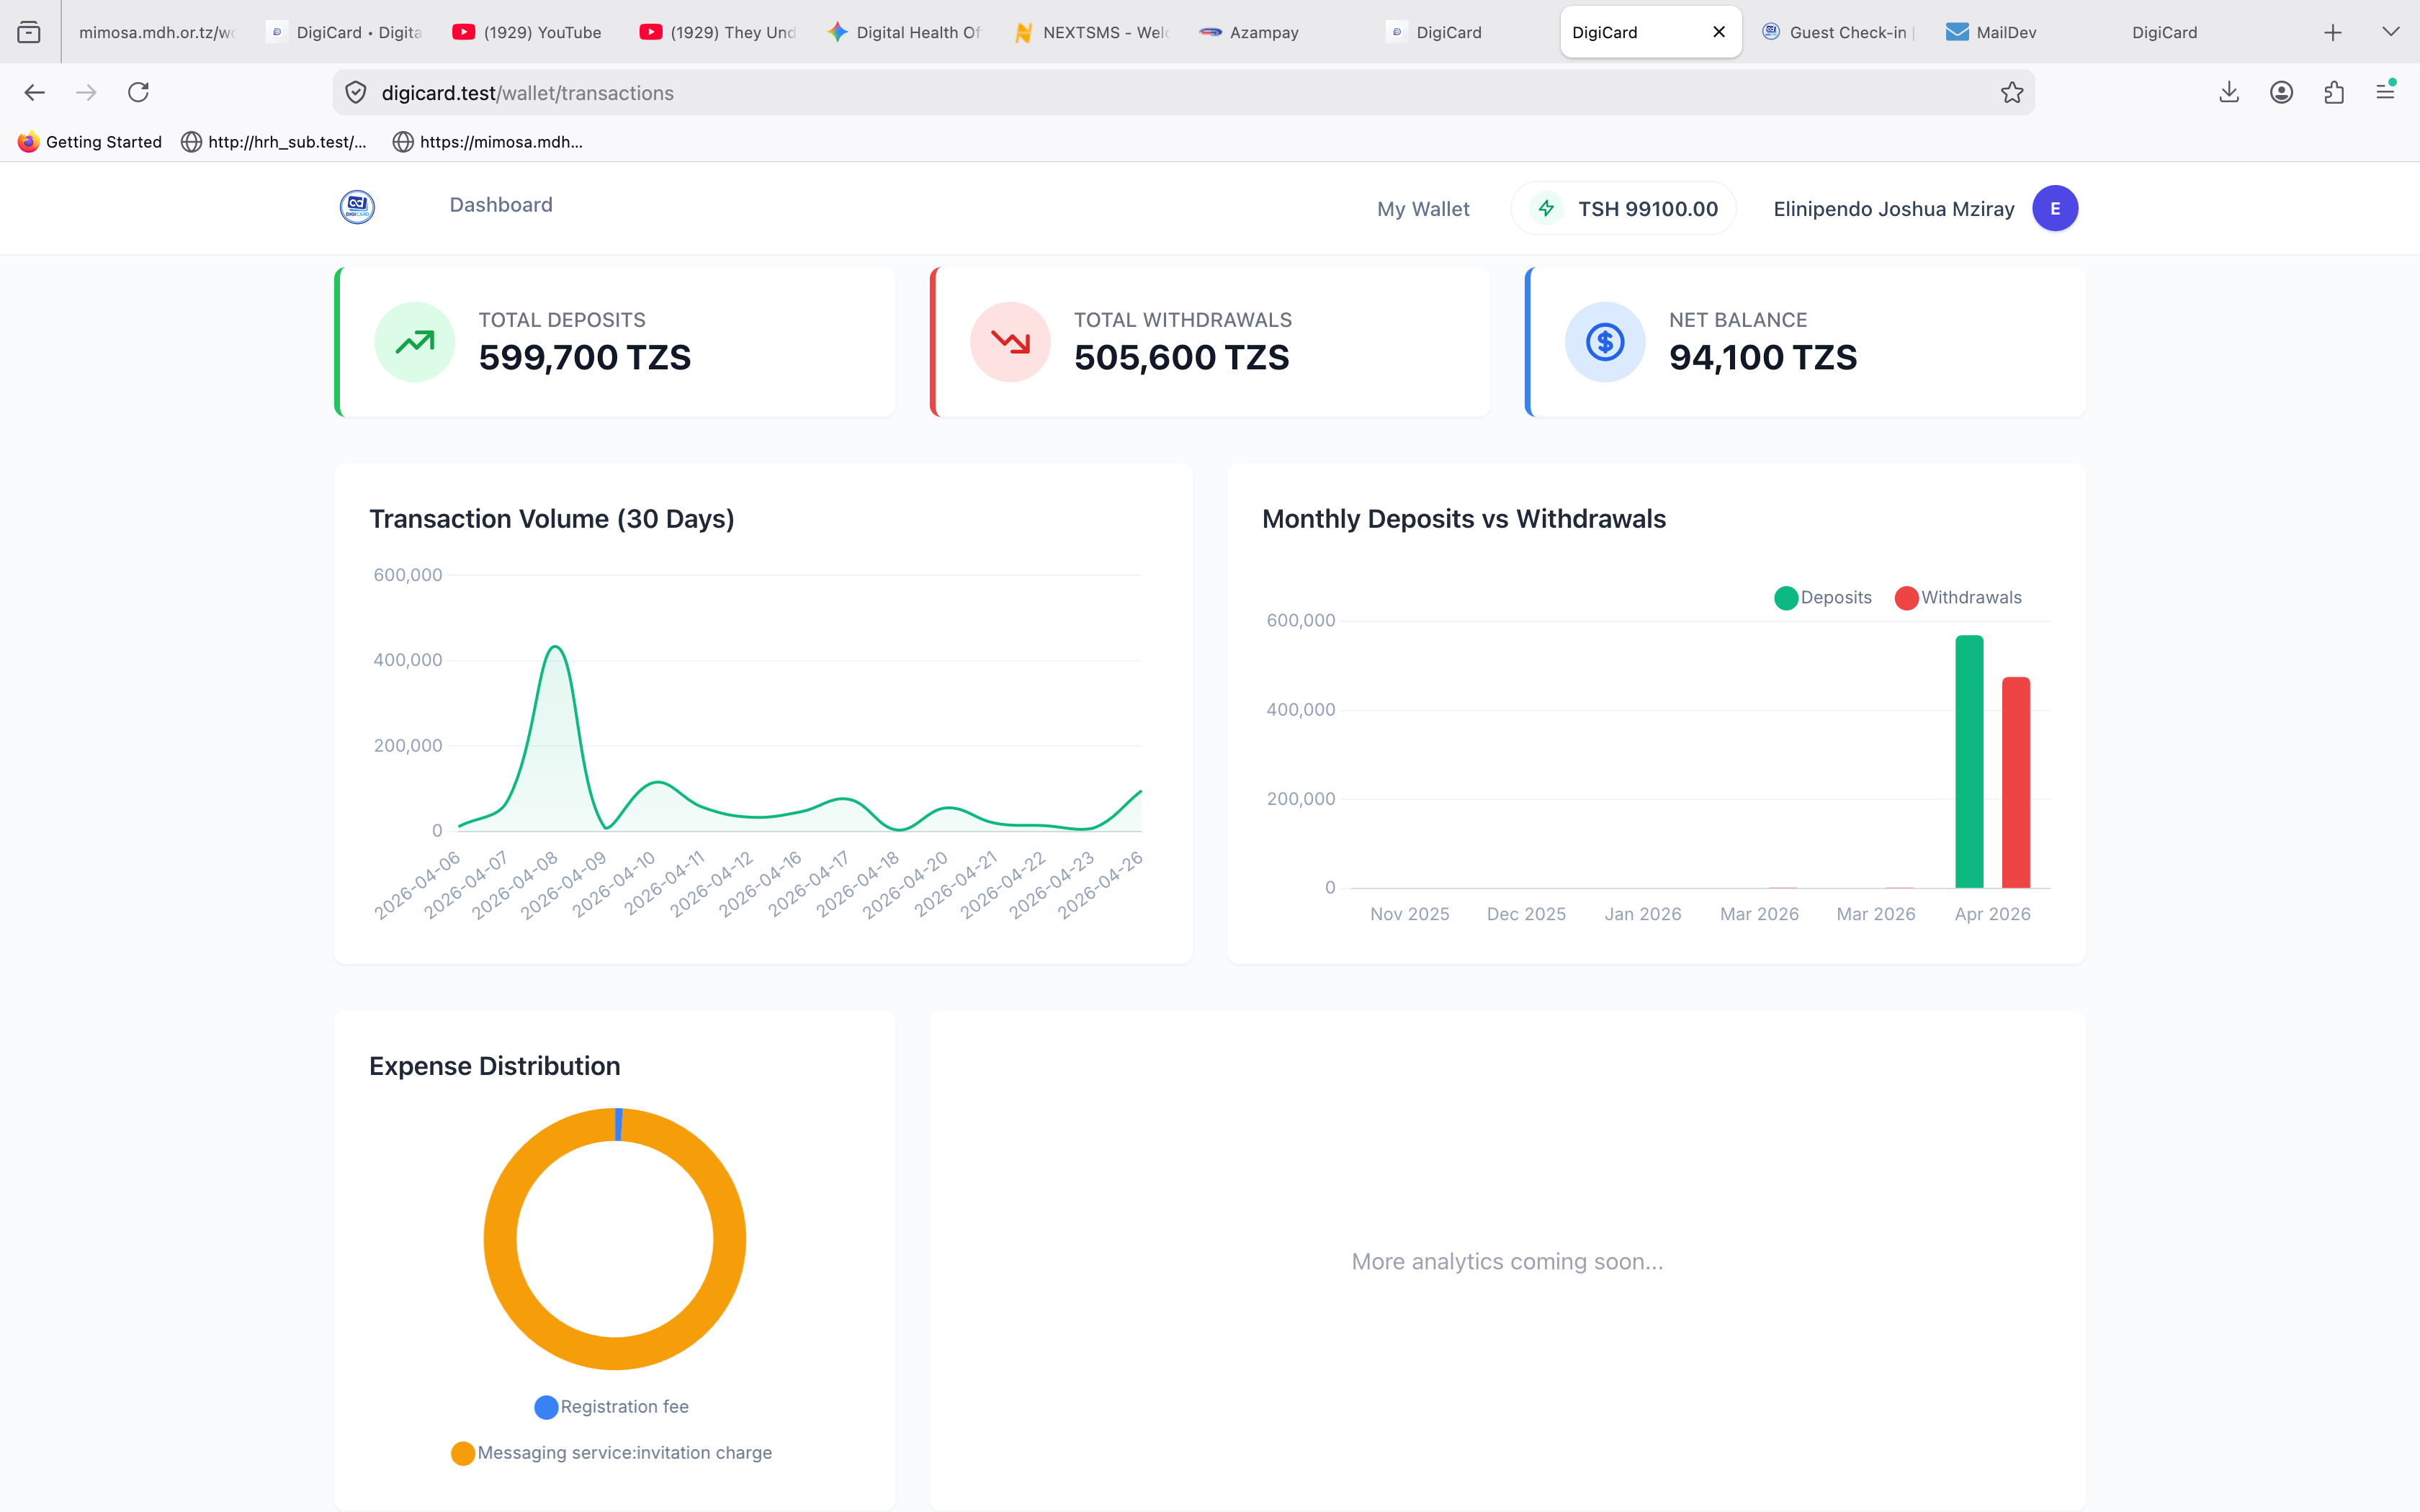
9. Wallet & Payments
Top up your DigiCard wallet to send invitations.
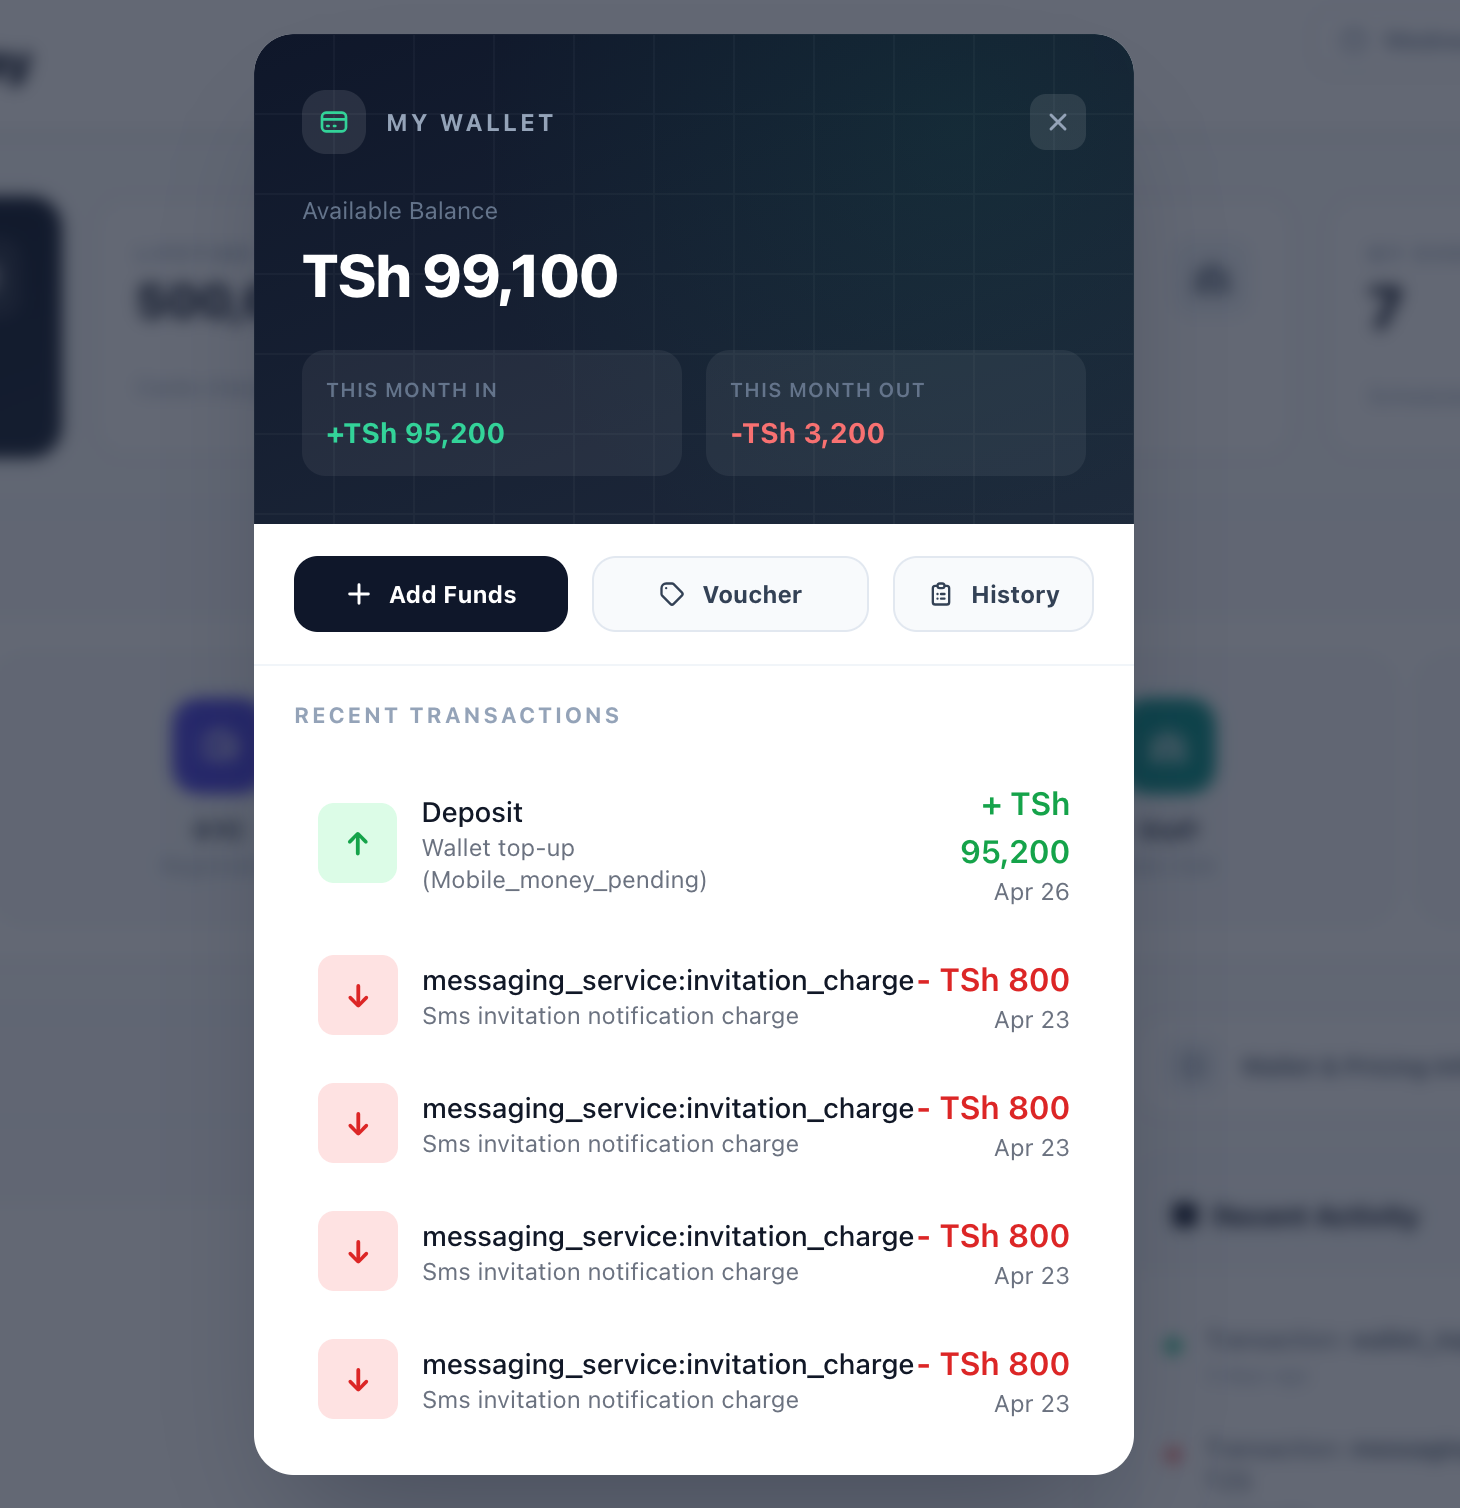
Adding funds to your wallet
Top up your DigiCard wallet using any mobile money number — it doesn't have to match the one on your account.
-
Go to Wallet → Add FundsOpen the wallet section from your dashboard and click Add Funds.
-
Enter amount & phoneMinimum is 500 TZS. The number can be different from the one on your account.
-
Approve on your phoneA USSD prompt will appear — enter your PIN to authorize.
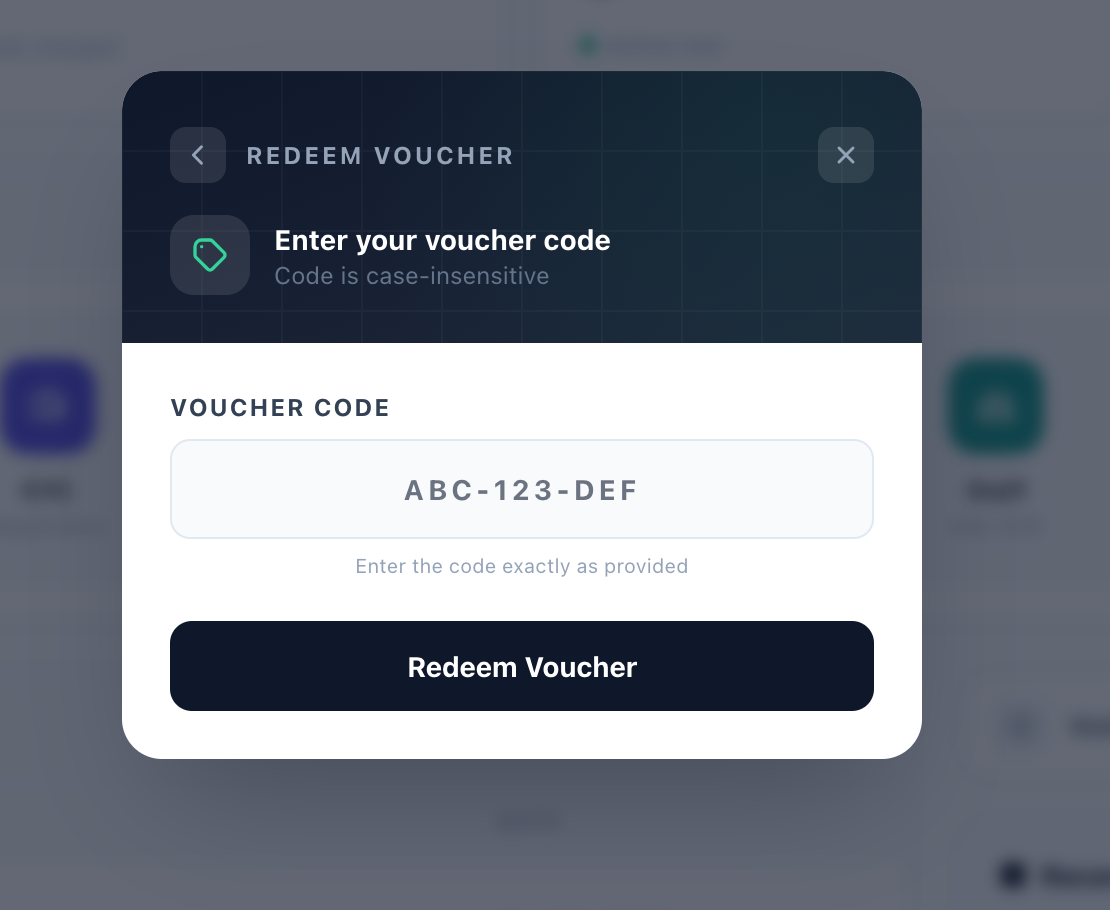
Redeem a gift token
If you've received a gift voucher or promotional token from DigiCard, you can redeem it here to credit your wallet instantly — no mobile money required.
Wallet deduction
Costs for sending invitations (WhatsApp or SMS) are automatically deducted from your wallet balance. Make sure you have enough funds before sending large batches.
10. Reports & Analytics
Get insights into your event performance with detailed reports.
Invitation Reports
Track delivery stats of your campaigns.
- Sent: Successfully delivered to recipient.
- Pending: Being processed by the gateway.
- Failed: Delivery failed (e.g., invalid number).
Guest Reports (RSVPs)
Monitor guest responses in real-time.
- Confirmed: Guest accepted the invite.
- Declined: Guest cannot attend.
- Checked In: Guest has arrived.
Reports overview
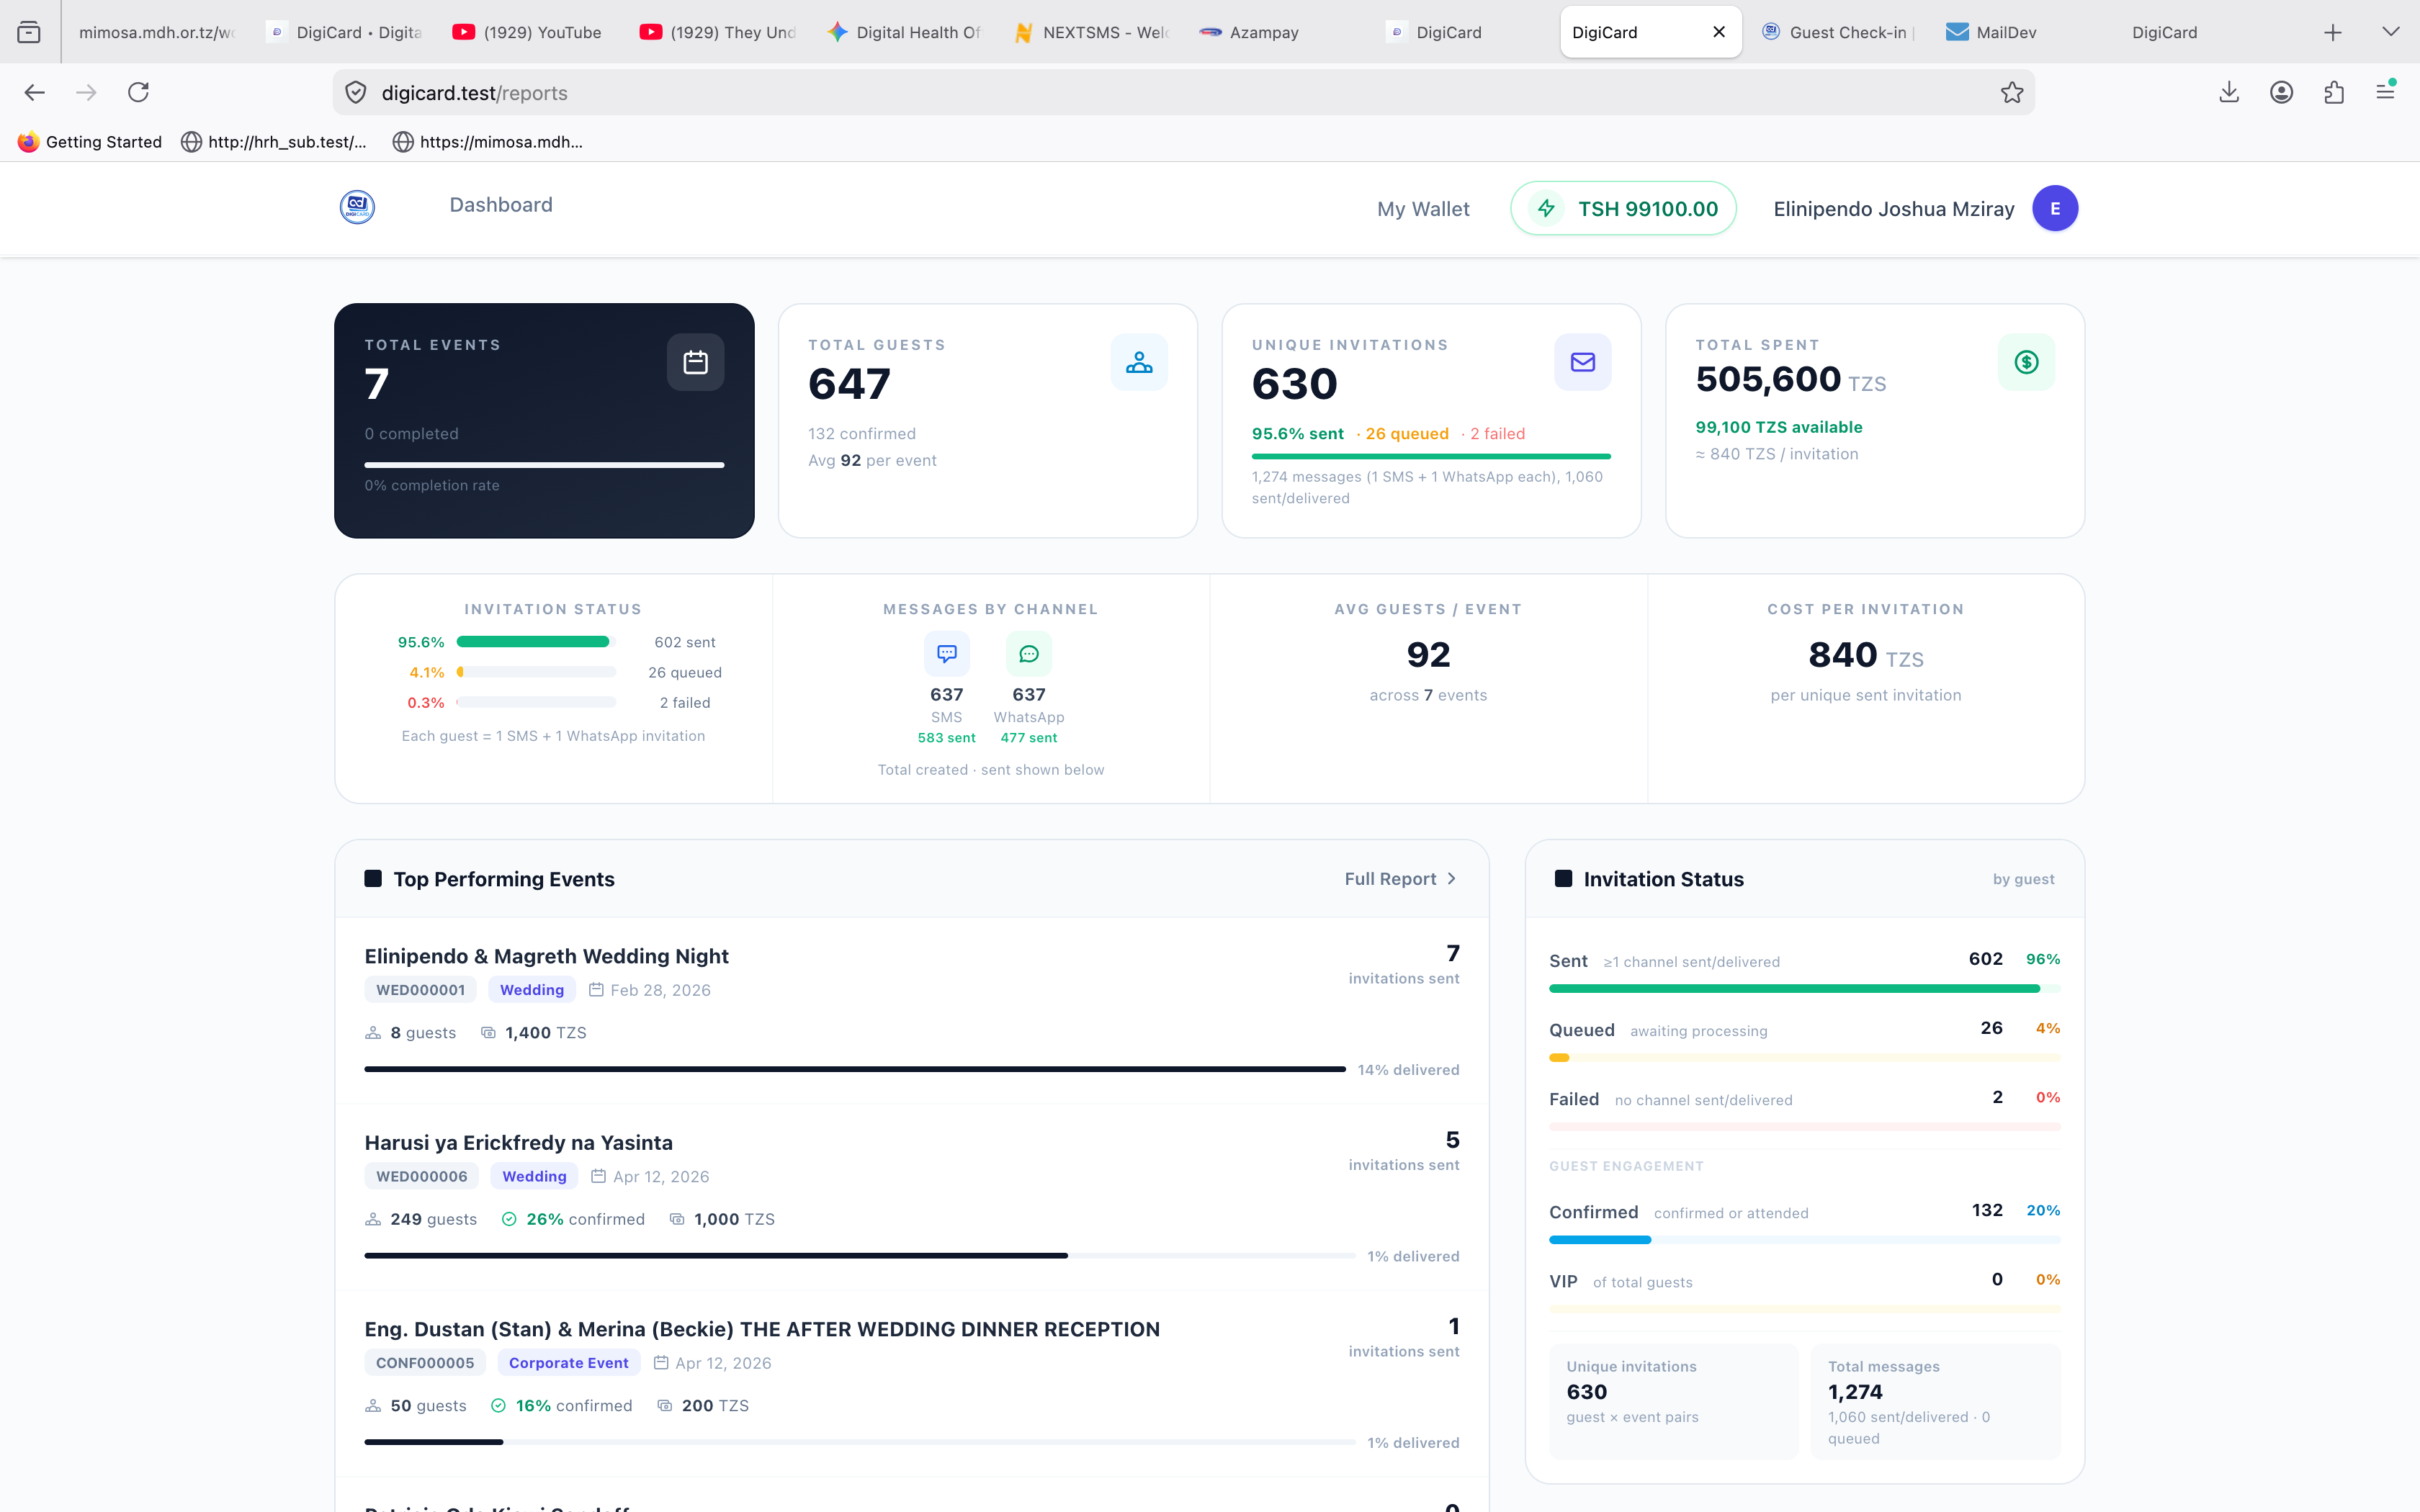
Analytics
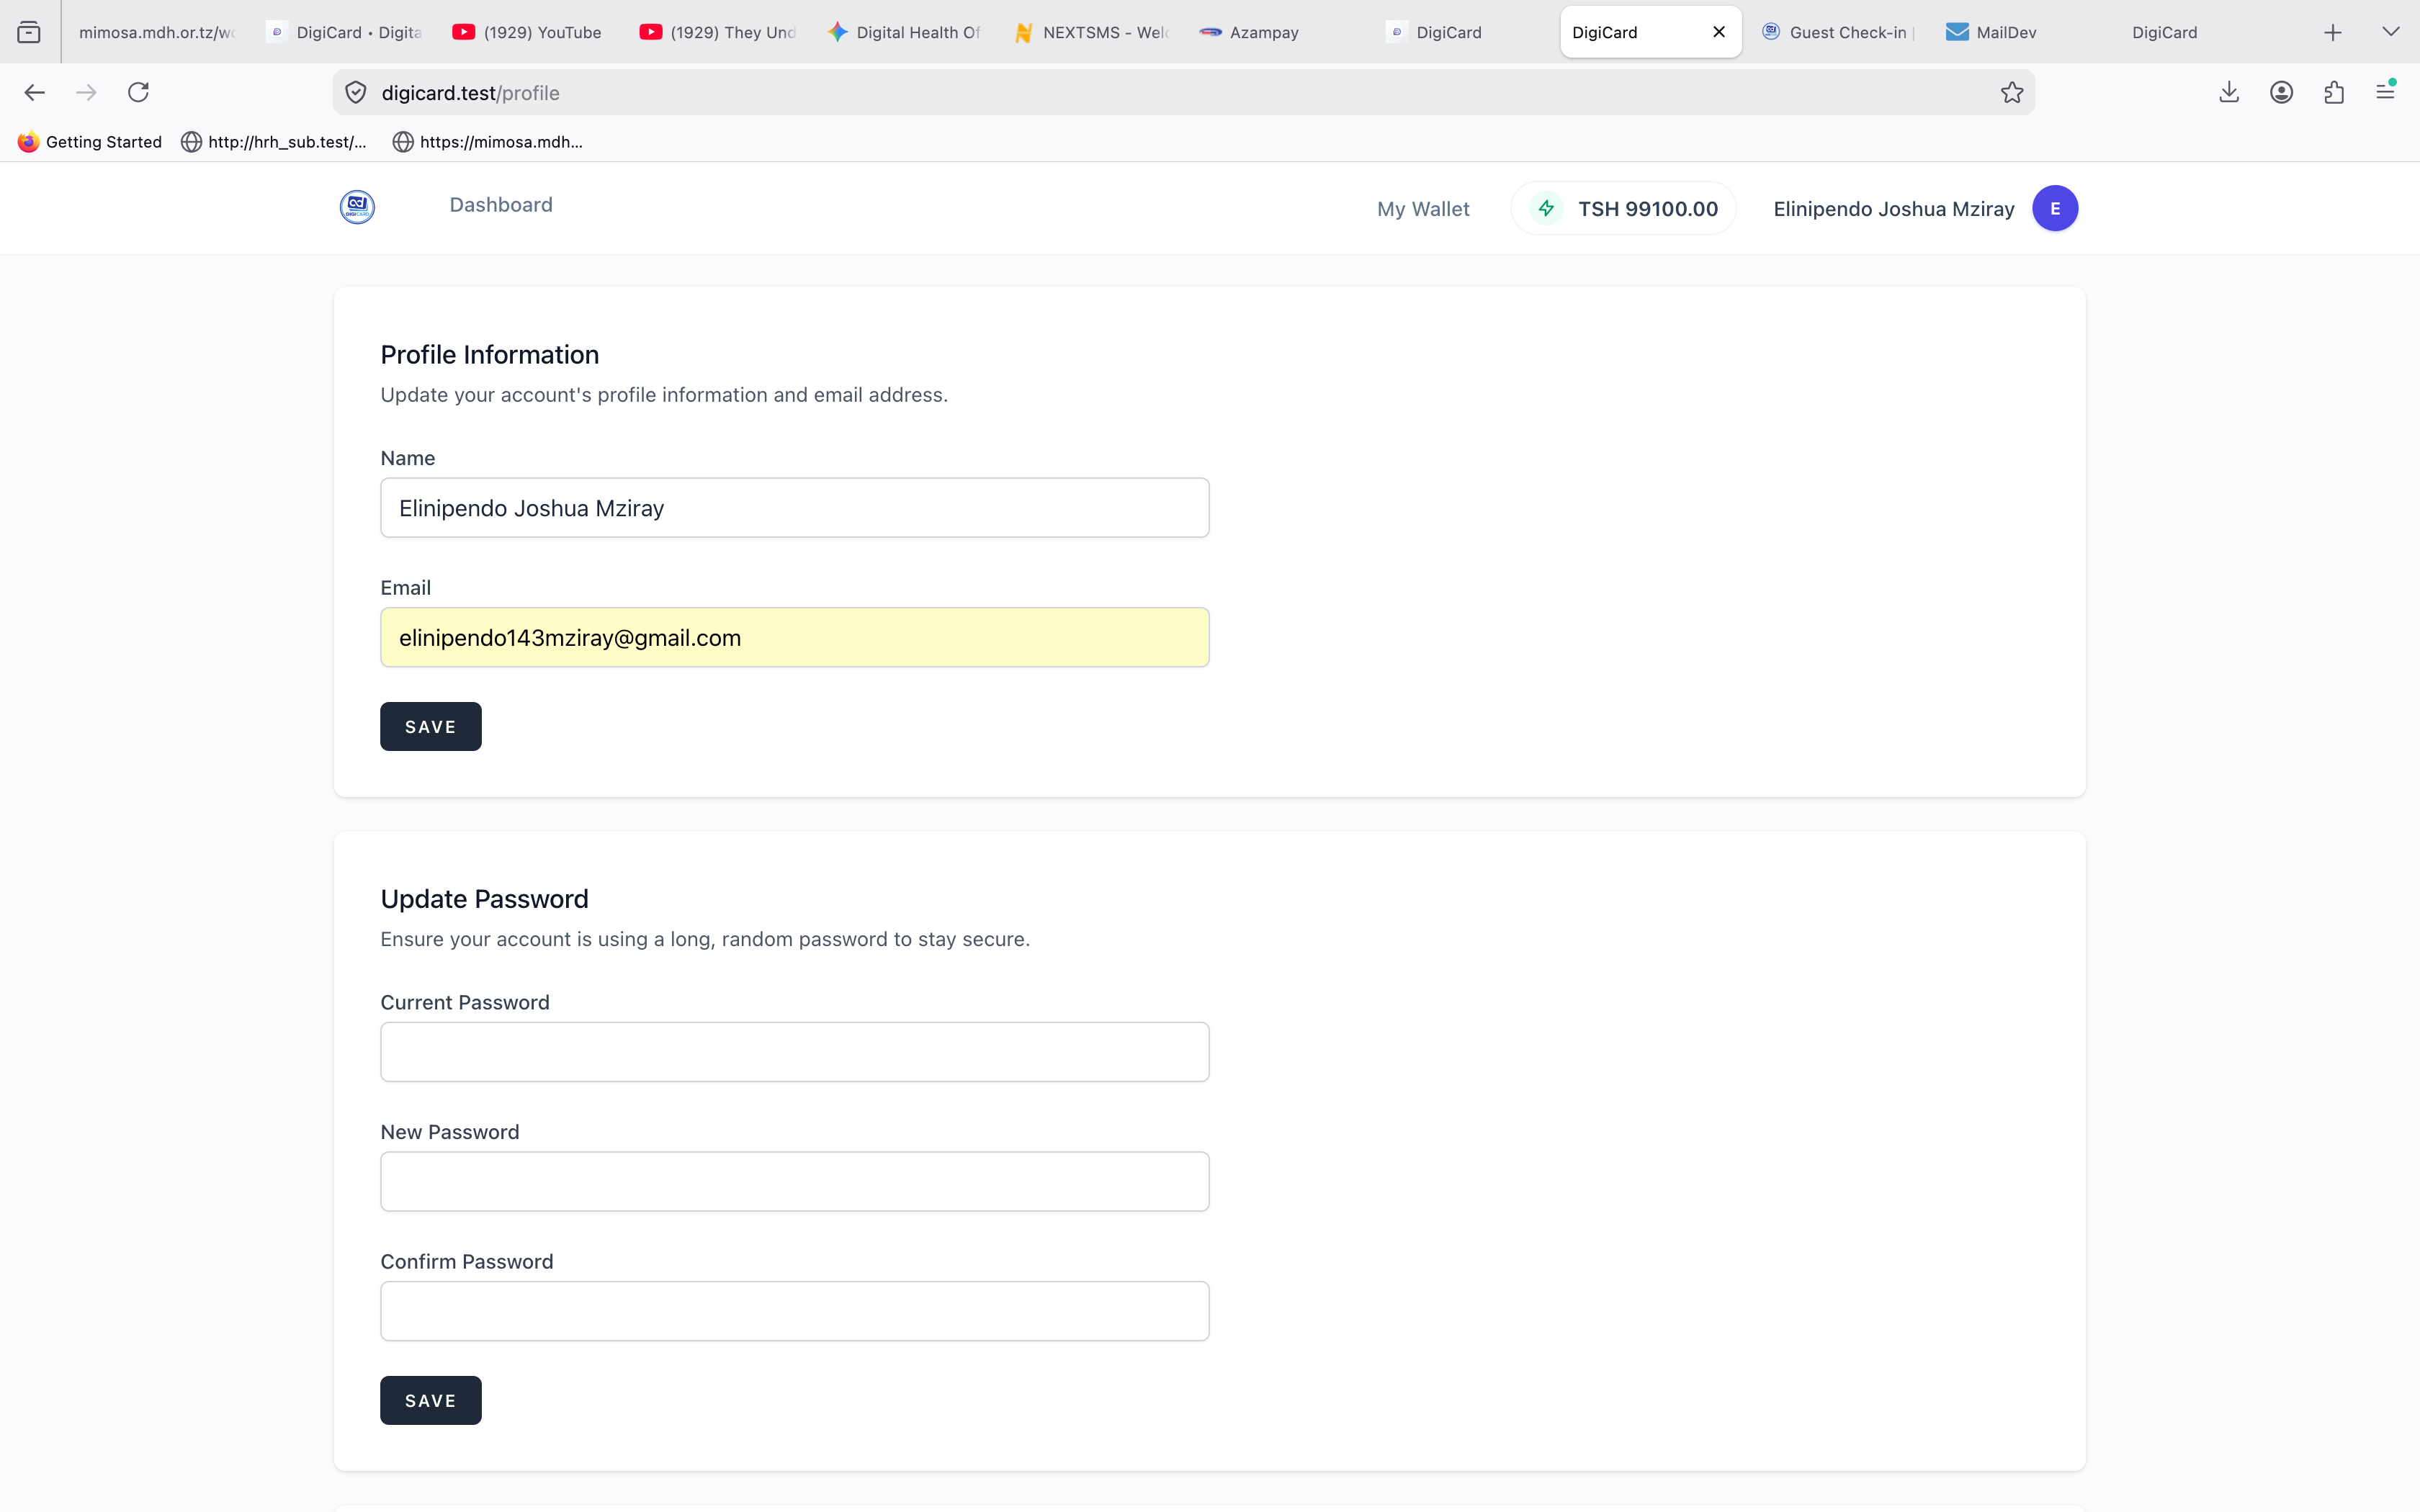
11. Profile Settings
Manage your account information and security.
We're a phone call away.
Our support team is based in Dar es Salaam and replies during business hours, Monday to Saturday.